Introduction to DIY K-Cup Storage Solutions
If you love your Keurig coffee maker, you know the convenience and variety K-cups bring to your morning routine. But with convenience can come clutter. This is where a DIY K-Cup drawer organizer can be a game-changer, efficiently solving the problem of scattered coffee pods all over your countertops. Not only does this DIY project help keep your K-Cups neatly organized and easily accessible, it also frees up valuable counter space, making your kitchen look tidier and more inviting. In this guide, I’ll walk you through the simple steps to create a custom K-cup storage solution that’s both functional and aesthetically pleasing. From selecting the right materials to the final touches, you’ll learn how to craft a drawer organizer that’s perfect for your personal coffee corner.
Materials Needed for Your K-Cup Drawer Organizer
To begin crafting your DIY K-cup drawer organizer, you’ll need a few essential materials. Choosing the right materials ensures durability and effectiveness in organizing your K-cups neatly. Let’s review the primary materials you’ll need for this project.
Plywood Selection and Alternatives
Plywood is the go-to material for constructing the base and sides of your organizer. Opt for 1/4 or 5mm plywood available at most hardware stores, providing a sturdy yet light base. If you prefer a thinner option, 3mm ply could work but might be harder to find and slightly less durable. For those seeking eco-friendlier or different textured alternatives, consider materials like bamboo panels or recycled composites, which can offer a unique look and feel.
Necessary Tools and Equipment
No elaborate toolkit is required for this DIY project. You will need:
- A measuring tape or a straight-edge measuring tool to get precise dimensions of your drawer.
- A pencil for marking measurements accurately.
- A saw for cutting the plywood to fit the dimensions of your drawer. A standard hand saw will work, but if you have access to power tools, a circular saw or jigsaw can make the task quicker and smoother.
- A drill with a 1.5 or 1.25-inch drill bit to create openings for the K-cups. This allows each K-cup to sit snugly and be easily accessible.
Make sure to measure twice and cut once to ensure all components fit perfectly within your drawer. With these materials and tools, you’re ready to proceed to the next step of the building process.
Measuring and Cutting the Drawers for Perfect Fit
To ensure your DIY K-cup drawer organizer fits perfectly, precise measurement and cutting are crucial.
Determining the Size of the Organizer
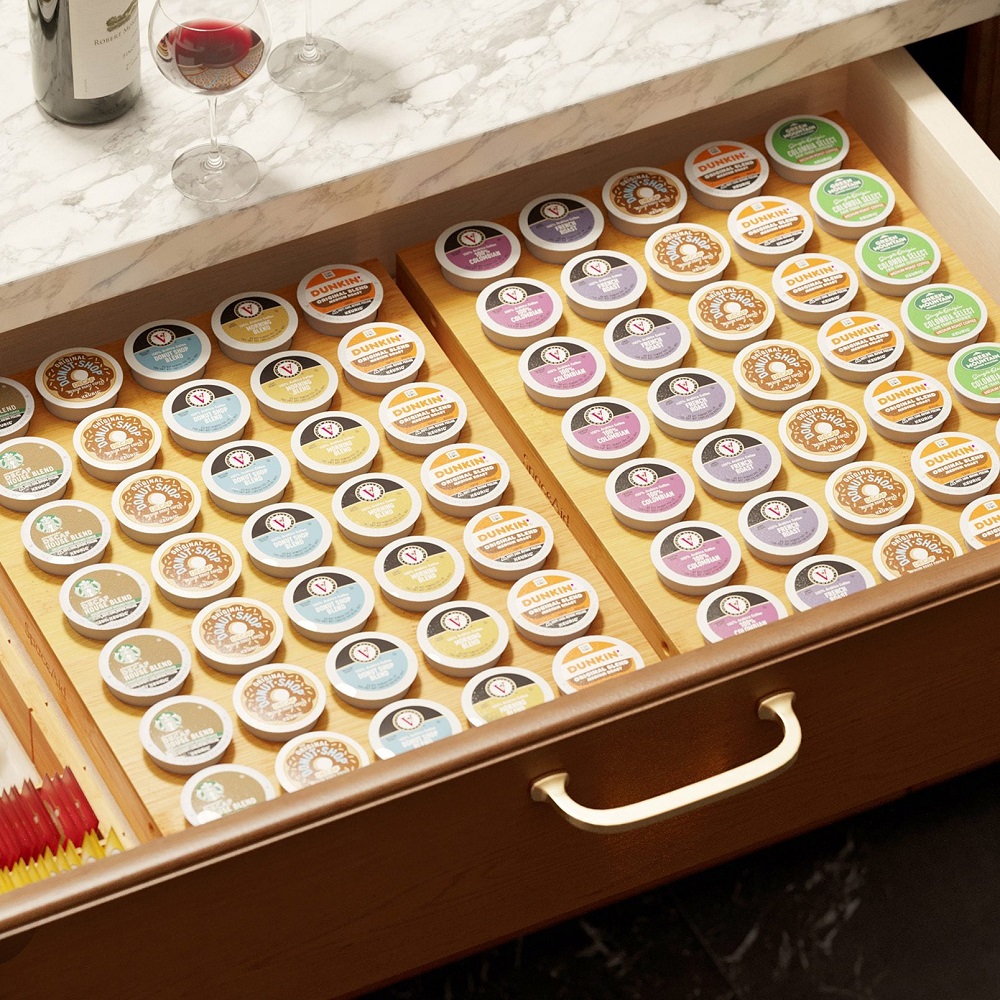
Begin by accurately measuring your drawer’s width and length. Keep a notepad handy to jot down these numbers. Use these measurements to size your organizer. Remember, correct sizing is key for an organizer that looks built-in.
Preparing Plywood for the Drawer
Transfer the drawer measurements onto the plywood using a pencil and straight-edge tool. Next, carefully cut the plywood to match these dimensions. This will form the top section of your organizer. When selecting your drill bit, opt for either 1.5 or 1.25 inches, which are ideal sizes for K-cups. Aim for precision to avoid gaps or overhang in the drawer.
Crafting the Sides and Compartments
Creating an effective DIY K-Cup drawer organizer involves designing side walls for stability and crafting openings for individual K-Cups.
Designing Side Walls for Stability
For a sturdy organizer, side walls are essential. They prevent K-Cups from shifting and keep the top panel elevated. Measure the depth of your drawer and cut the plywood sides to fit. Aim for a height that allows easy placement and removal of K-Cups, typically around three inches. If precision cutting is a challenge, simple techniques like sanding edges or using wood glue can ensure a snug fit.
Creating Openings for K-Cups
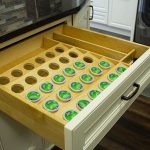
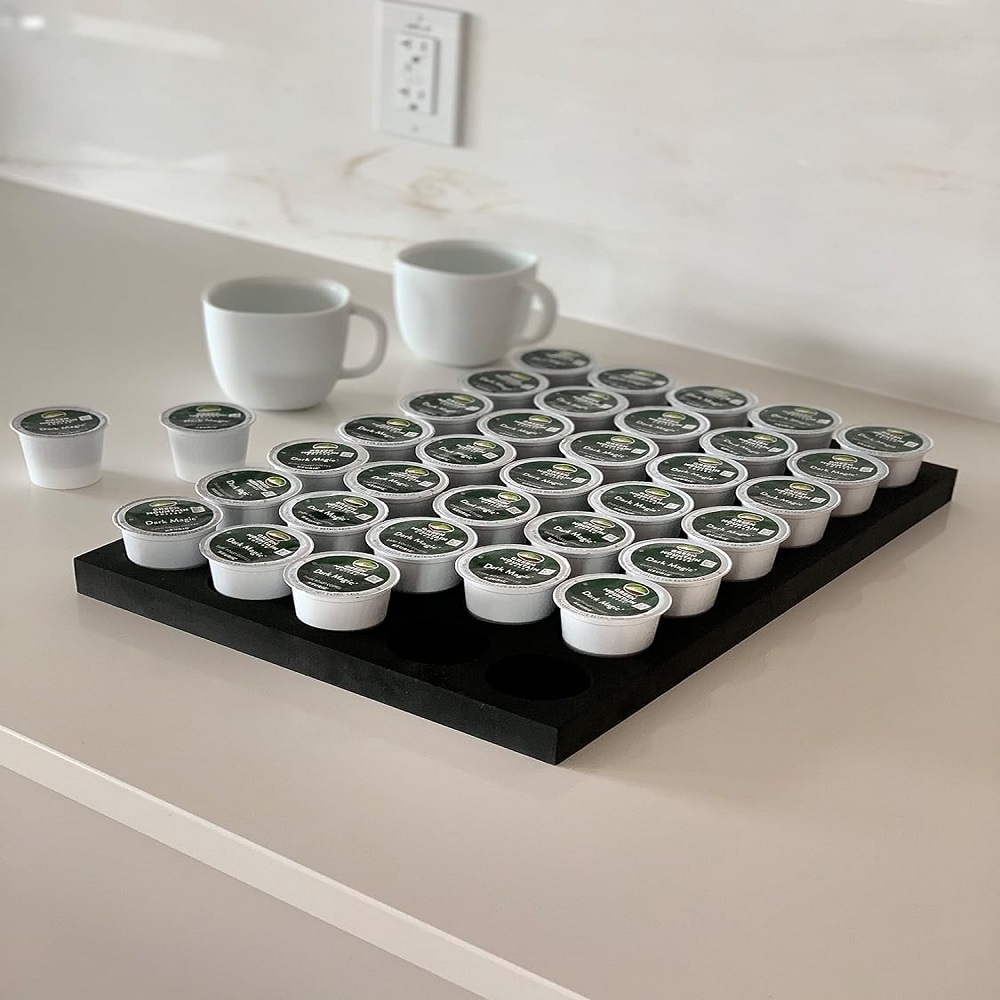
Next, plan the layout of K-Cup openings on the top panel. Each K-Cup is roughly two inches in diameter, so create openings slightly larger for easy access. Using a pencil, mark where you’ll drill; a shot glass can serve as a guide for the 1.5-inch circles. Drill the holes with your chosen bit size, ensuring they are evenly spaced for a neat look. This careful planning results in a functional and visually appealing organizer.
Assembling the K-Cup Organizer
Once you’ve prepared all the pieces for your DIY k-cup drawer organizer, it’s time to assemble them. This is where your project starts to take shape and come alive as a functional storage solution for your K-cups. Let’s go through the steps involved in constructing the frame and securing the sides, as well as drilling and cutting out the cup openings.
Constructing the Frame and Securing Sides
Building the frame of your organizer is straightforward. Start by positioning the cut plywood on the sides of your drawer. Make sure they fit snugly. If you cut them with tabs using a laser cutter, join them together. If not, you can use wood glue, hot glue or tape to fasten them securely. Alternatively, if they are cut to precise measurements, simply wedging them in place may suffice. Remember to check that they’re level so your K-cups sit evenly once in place.
Drilling and Cutting Out the Cup Openings
Now for the fun part – creating homes for each K-cup. Begin by marking out the spots for each opening on your plywood top, using the two-inch diameter of a K-cup as your guide. You may want to use a template like a shot glass to trace perfect circles. Once marked, take your drill with a 1.5 or 1.25-inch drill bit and create the holes. Work slowly to ensure clean cuts. Sand any rough edges for a smooth finish. When you’ve cut all openings, place the top panel onto the frame in the drawer, and your DIY k-cup drawer organizer is nearly complete. With these simple steps, you’ll have a customized K-cup organizer that not only saves space but also adds a neat and clean look to your coffee area.
Placement and Finishing Touches
Once you’ve constructed your DIY K-cup drawer organizer, the last steps will ensure a polished look and secure fit. These final touches make your organizer not only functional but also pleasing to the eye. Let’s wrap up your project with the finishing details.
Sanding and Fitting Dowel Rods
Now, take any dowel rods you’ve cut and ensure they fit snug in the drawer. If they’re too long, sand them down bit by bit. You want a tight fit, but not so tight that they warp. Smooth edges are key for a clean, professional look. Carefully sand each dowel rod until they slide smoothly into place between the K-cups. No glue needed, if they sit flush with the sides. This step is simple but vital for the appearance and function of your organizer.
Placing the Organizer into the Drawer
With all parts smooth and ready, gently place your organizer into the drawer. It should sit comfortably without forced pressure or gaps on the sides. Once in place, fill it with your K-cups. You will see how they sit neatly, easy to grab and well-organized. A perfect-fit organizer will now turn your once cluttered drawer into a sorted, visually appealing coffee pod display. And just like that, your DIY project is complete, upgrading your morning coffee routine instantly!
Additional Tips and Tricks
Now that your DIY k-cup drawer organizer is in place, here are some extra tips and tricks to make the most of your creation. These suggestions will help customize and enhance your storage solution even further, ensuring it meets all your needs.
Customizing the Organizer for Your Space
Customizing your k-cup organizer can make it blend seamlessly with your kitchen aesthetic. You can paint or stain the wood to match your cabinets or drawers. Think about adding labels or decorative touches to create a personalized look. Measure your drawer once more to see if you can add more rows or perhaps a dedicated space for sugar packets and stirrers. Make your organizer suit your style and functionality needs.
Optional Steps for Enhanced Durability
To boost the lifespan of your organizer, consider a few durability steps. Apply a coat of clear varnish or wood sealant to protect the wood from spills or stains. If you have not glued the dowels, you may want to secure them with wood glue for added stability. Check the tightness of the fit periodically, and sand down any areas that swell or stick due to humidity changes. These small steps will maintain your organizer’s look and function over time. With these final tips, you’ve equipped yourself to master the DIY k-cup drawer organizer challenge. Enjoy your clutter-free and stylish coffee corner!
