Introduction to DIY Kitchen Drawer Organization
Organizing your kitchen drawers can do more than just eliminate clutter. With DIY approaches, you can customize your space to fit your specific needs while saving money. A well-organized drawer serves up efficiency and a pleasing aesthetic. Whether you’re a culinary enthusiast or simply seeking order in your kitchen, a DIY kitchen drawer organizer project could be a game changer.
Benefits of Organizing Kitchen Drawers
By tackling a kitchen drawer organizer DIY project, you reap several benefits. First, you enhance your daily workflow with easily accessible tools and utensils. You end time wasted digging through cluttered drawers. This efficiency can make meal prep more enjoyable. Also, your drawers can hold more items and reduce the chances of items getting damaged. An organized kitchen can even relieve stress, creating a calm environment where you can focus on cooking.
Tools and Materials Needed
To begin your DIY project, gather the right tools and materials. You’ll need measuring tape, a saw or cutter for materials like wood or plastic, sandpaper, a marking tool, glue or screws, and possibly additional hardware. For materials, consider durable options like wood, bamboo, acrylic, or metal. Choose based on durability, ease of cleaning, and the style of your kitchen. Remember to account for the thickness of the separators when measuring space in your drawers. Keep in mind, the tools and materials may vary depending on your design and complexity.
Planning Your Kitchen Drawer Layout
Before crafting a kitchen drawer organizer DIY, planning is vital. It ensures the organizer fits your space and meets your specific needs. Start by assessing the space. Then, think about what you need from your organizer. Keep in mind, a good plan will make the DIY process smoother and the result more functional.
Assessing Drawer Space and Needs
First, empty your drawers and measure them. Note the width, depth, and height. Think about what you store in each drawer. Do you have lots of cutlery or cooking utensils? Are there bulky items like rolling pins or food processors? Write down a list of items from each drawer. This helps you plan the size and number of compartments needed.
Remember, the goal is to make everything accessible. Each item should have a clear spot. This will help you find tools fast and keep your drawers tidy longer.
Design Tips for Maximum Efficiency
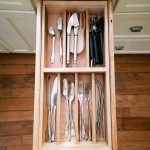
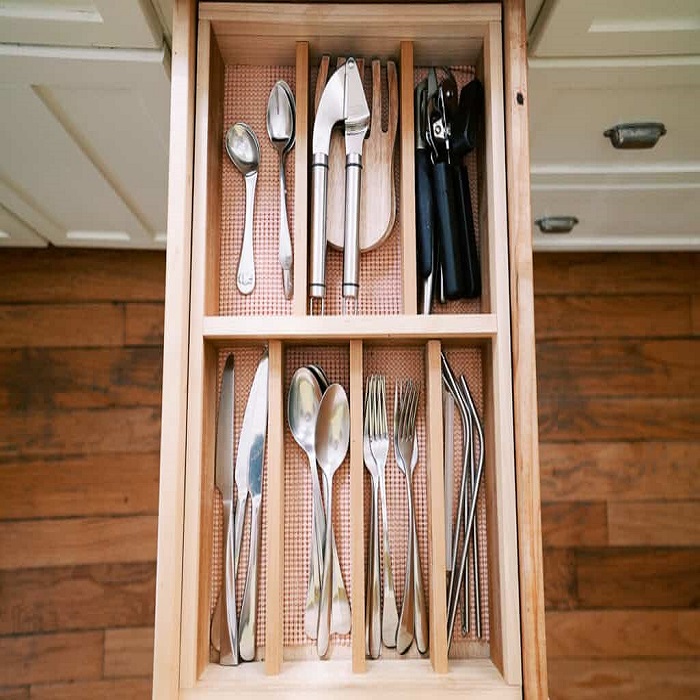
When designing, aim for maximum efficiency. Use simple dividers for cutlery and flat tools. Consider deeper compartments for bulky items. Make use of all available space. If there is extra height, think about stacking dividers.
Keep the design flexible. Your needs may change over time. Choose a layout that lets you adjust compartment sizes easily. Also, consider the flow of your kitchen. Place items near where you use them most. This saves time during cooking and cleaning.
Use durable materials. They will withstand daily use and cleaning. Think about the style of your kitchen, too. Pick materials and finishes that match or complement your decor.
In summary, plan with care. Measure your space, assess your needs, and design for efficiency and adaptability. Choose materials wisely for durability and style. With a good plan, your kitchen drawer organizer DIY will enhance both the function and aesthetics of your kitchen.
Step-by-Step Guide to Creating a Drawer Organizer
Creating your kitchen drawer organizer DIY is a step you can proudly take towards improved kitchen efficiency. Let’s walk through the fundamental steps you need to follow to transform your drawer’s chaos into organized bliss.
Measuring and Cutting Materials
Begin by accurately measuring your drawer dimensions; note the width, depth, and height. Use the measuring tape to get the precise numbers. Then, decide on the number of dividers based on the items you listed during the planning stage.
Once you map out your organizer, mark the measurements on your choice of material, whether it’s wood, acrylic or metal. Using a saw or cutter, carefully cut the material to size. Keep the edges as smooth as possible. If you’re working with wood, sand the edges to prevent splinters.
Remember to include the thickness of the material in your calculations. Making precise cuts ensures a snug fit and a professional look.
Assembling the Drawer Organizer
With your pieces cut, it’s time to put them together. If you’re using wood or bamboo, wood glue can create strong joints. For a more secure hold, screws might be better. With plastic or acrylic, special adhesives are available.
Align the dividers as planned and attach them to the base, if your design requires one. For adjustable organizers, you can use grooves or slots to allow for movement. Make sure all dividers are secure and even before placing the organizer in the drawer.
Test the fit. If adjustments are needed, now is the time. Once satisfied, place your organizer inside the kitchen drawer and fill it with your tools and utensils. Enjoy the ease of finding everything you need in its designated spot.
In just a few steps, you’ve taken your kitchen drawer from cluttered mess to an organized, efficient space. The satisfaction of completing a kitchen drawer organizer DIY project that enhances your daily routine can’t be beaten.
Custom Solutions for Different Types of Utensils
Designing your kitchen drawer organizer involves considering the variety of utensils you own. From slim cutlery to bulky kitchen gadgets, each item should have a designated space. Personalizing your drawer organizers can greatly enhance the functionality of your kitchen.
Dividers for Cutlery and Tools
Cutlery and small tools are essential in any kitchen, but they can easily get mixed up. Creating DIY dividers helps in neatly separating spoons, forks, knives, and small gadgets. Measure the length of your cutlery to determine the best height for your dividers. Using materials like thin woods or acrylic ensures durability and ease of cleaning. For a seamless look, you can paint or seal the dividers to match your drawer’s interior.
Special Organizers for Bulky Items
Bulky items like rolling pins, large spatulas, or even food processors pose a challenge due to their size and shape. Special organizers tailored for these items ensure they are well kept and easy to access. Consider using deeper compartments or customizable sections that can adjust to the size of the items. Utilize the full height of your drawers if possible, so tall items can be stored upright. This organization not only optimizes space but also prevents damage from improper storage.
By focusing on tailor-made solutions for each type of utensil, you significantly improve the usability of your kitchen spaces. Whether it’s creating adjustable sections or adding special fittings, your DIY kitchen drawer organizer can address all types of storage needs.
Adding Aesthetic Touches to Drawer Organizers
Your kitchen drawer organizer DIY doesn’t only have to be practical; it can also enhance your kitchen’s style. Visual appeal is important. It makes your space more inviting. Let’s explore ways to add beauty to your organizers.
Choosing Materials That Complement Your Kitchen
Select materials that blend well with your kitchen’s design. Wood adds warmth, while metal may give a modern look. Acrylic can offer a sleek, minimalist vibe. Think about your kitchen’s color scheme and overall theme. Pick materials that echo these elements. Dark woods can add depth, while lighter tones can make spaces feel bigger. Durability is key, but so is style. Your organizers should not only work well but also look good.
Decorative Finishes and Handles
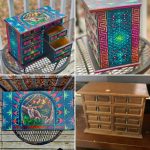
Adding finishes and handles can make a big difference. Consider paint or varnish that matches your cabinet. Use finishes that are easy to clean and maintain. For a personal touch, add decorative handles or knobs. This makes pulling out drawers easy and adds a unique touch. Look for handles that fit the style of your kitchen. They can be vintage, modern, or custom-made. These details might seem small, but they can have a huge impact on the overall look. Choose wisely to create a cohesive look. It’s the small touches that will make your DIY project truly stand out.
Maintenance Tips for Your DIY Drawer Organizer
Maintaining your kitchen drawer organizer DIY ensures it keeps serving you well. Regular care extends its life and appeal. Follow these tips to keep your DIY organizer in top condition.
Cleaning and Care Advice
Clean your organizer regularly to prevent dirt buildup. Use a damp cloth for daily cleaning. Avoid harsh chemicals that can harm the material. For wood or bamboo, use a mild soap and water solution. Let the organizer dry fully before placing utensils back. Check for loose screws or worn parts. Fix them right away to avoid further damage.
Adjusting Dividers as Needs Change
Your storage needs might change over time. Be prepared to adjust your dividers. If they’re removable or adjustable, reconfigure them as needed. Ensure they still provide a secure fit for all your items. This keeps your drawers organized and functional. Regular checks and tweaks will help your DIY drawer organizer remain a custom fit to your evolving kitchen needs.
Real-Life Examples and Inspirations
Turning ideas into real-world projects is a great way to feel motivated. Many have found success in DIY kitchen drawer organizer projects. Their stories can inspire your designs. See how others have made cluttered drawers into well-organized spaces. Use their experiences to guide your project.
Success Stories and Photo Ideas
People often share their DIY successes online. Look at these before and after photos. They show the difference a good organizer can make. Notice how dividers help keep items in place. Some photos show creative use of materials. Include these in your gallery to inspire others.
Photos not only show the end result. They can show each step in the DIY process. From measuring to final touches, photos can be a helpful guide. They can show how to cut materials, or how to fit an organizer into a drawer. Use these ideas to make your project smoother.
Lessons Learned from DIY Projects
Every project teaches something. Some learn that planning is key to a perfect fit. Others find that choosing the right materials saves time later. These lessons learned can save you from making the same mistakes. Here are a few common ones:
- Measure twice, cut once: Accurate measurements are crucial.
- Simple designs often work best: They make it easy to find and grab what you need.
- Adaptability is important: Your needs can change, so make organizers that can change too.
When you start your kitchen drawer organizer DIY, remember these tips. They can make your project more likely to succeed. And once you’re done, share your story. It could inspire someone else to organize their kitchen drawers.
