Introduction:
Having a cluttered and disorganized knife drawer can be frustrating and even dangerous. Not only does it make it difficult to find the right knife when you need it, but it also increases the risk of accidents when handling sharp blades. Thankfully, with a few simple steps, you can create a DIY knife drawer organizer that will keep your cutlery neatly arranged and easily accessible. In this article, we will guide you through the process of creating your own organizer, ensuring that your knives are safely stored and your kitchen remains tidy.
Choosing the Right Materials:
Before you begin constructing your knife drawer organizer, it’s essential to gather the necessary materials. First and foremost, you will need a sturdy wooden or plastic drawer insert that fits your drawer’s dimensions. This insert will serve as the base for your organizer. Additionally, you will require a measuring tape, a pencil, a saw, sandpaper, wood glue (if using a wooden insert), and a non-slip liner or cork sheet to prevent the knives from sliding around in the drawer.

Measuring and Marking:
The next step is to measure the dimensions of your drawer accurately. Using a measuring tape, determine the length, width, and height of the drawer. Record these measurements, as they will be crucial in ensuring that your organizer fits snugly within the space available. Once you have the measurements, mark them on your drawer insert using a pencil. This step will act as a guide when cutting the insert to the appropriate size.
Cutting the Insert:
Using a saw suitable for cutting wood or plastic, carefully trim the drawer insert along the marked lines. Take your time and use smooth, controlled motions to achieve clean and accurate cuts. If you’re using a wooden insert, be sure to sand the edges afterward to remove any roughness or splinters. This step is essential for both safety reasons and to ensure a polished finished product.
Creating Knife Slots:
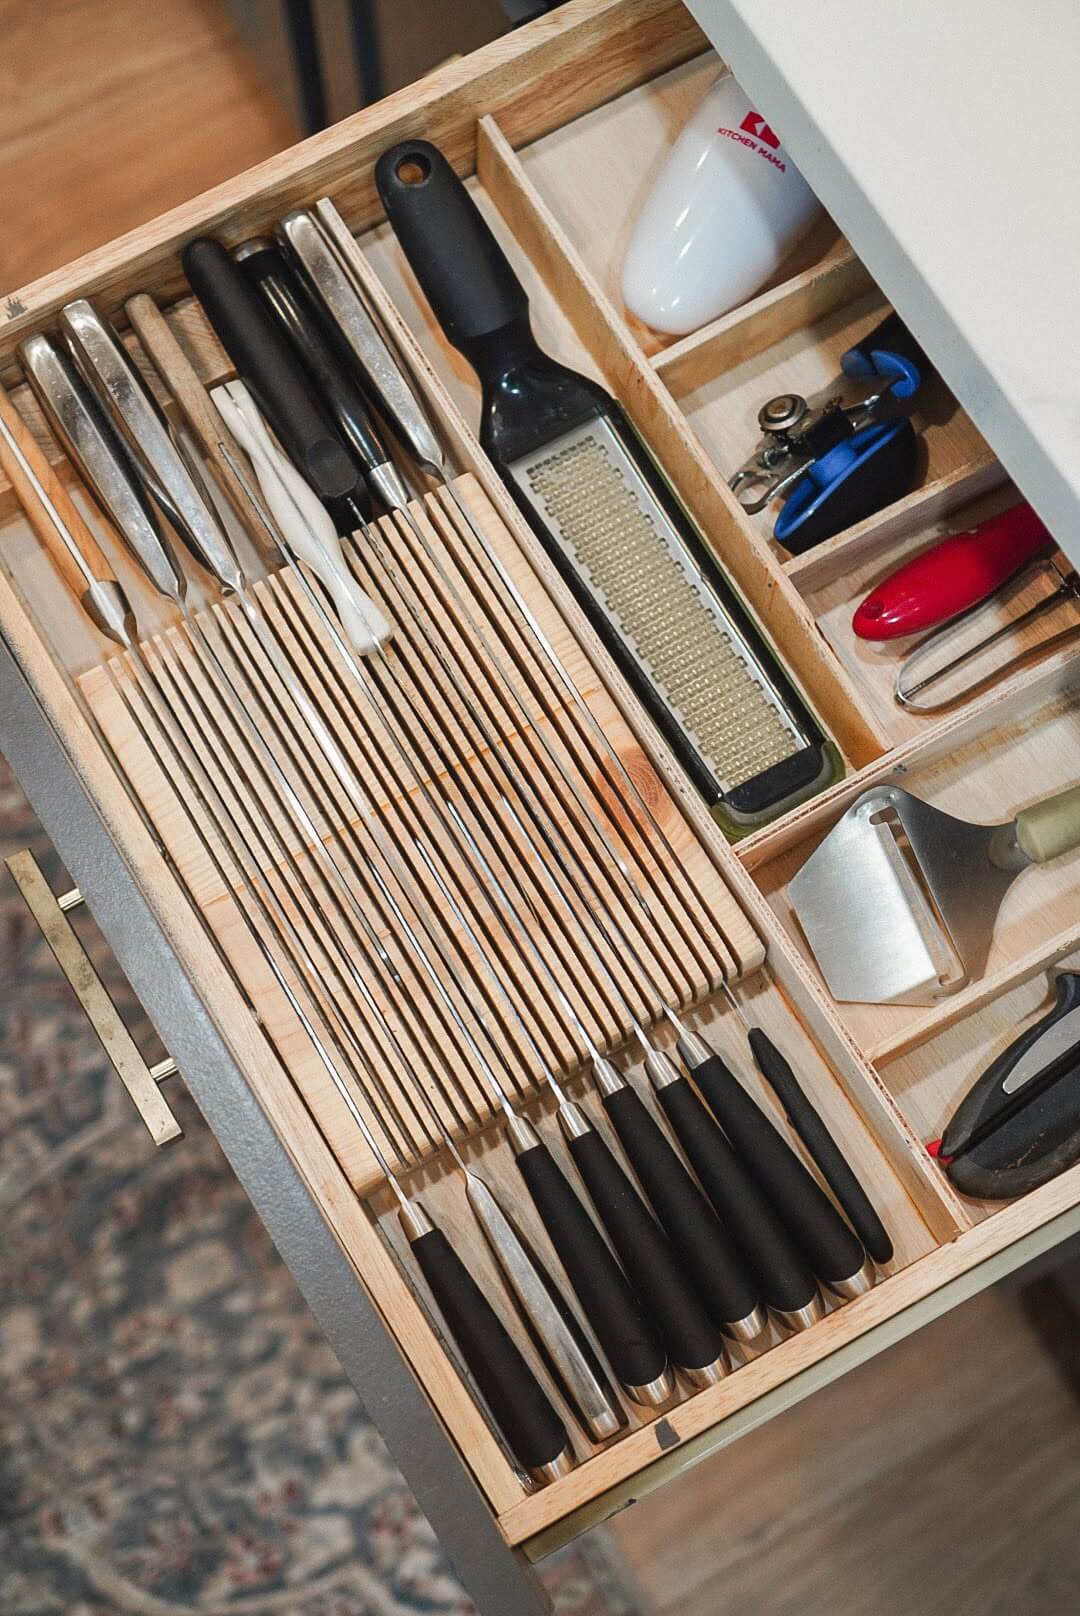
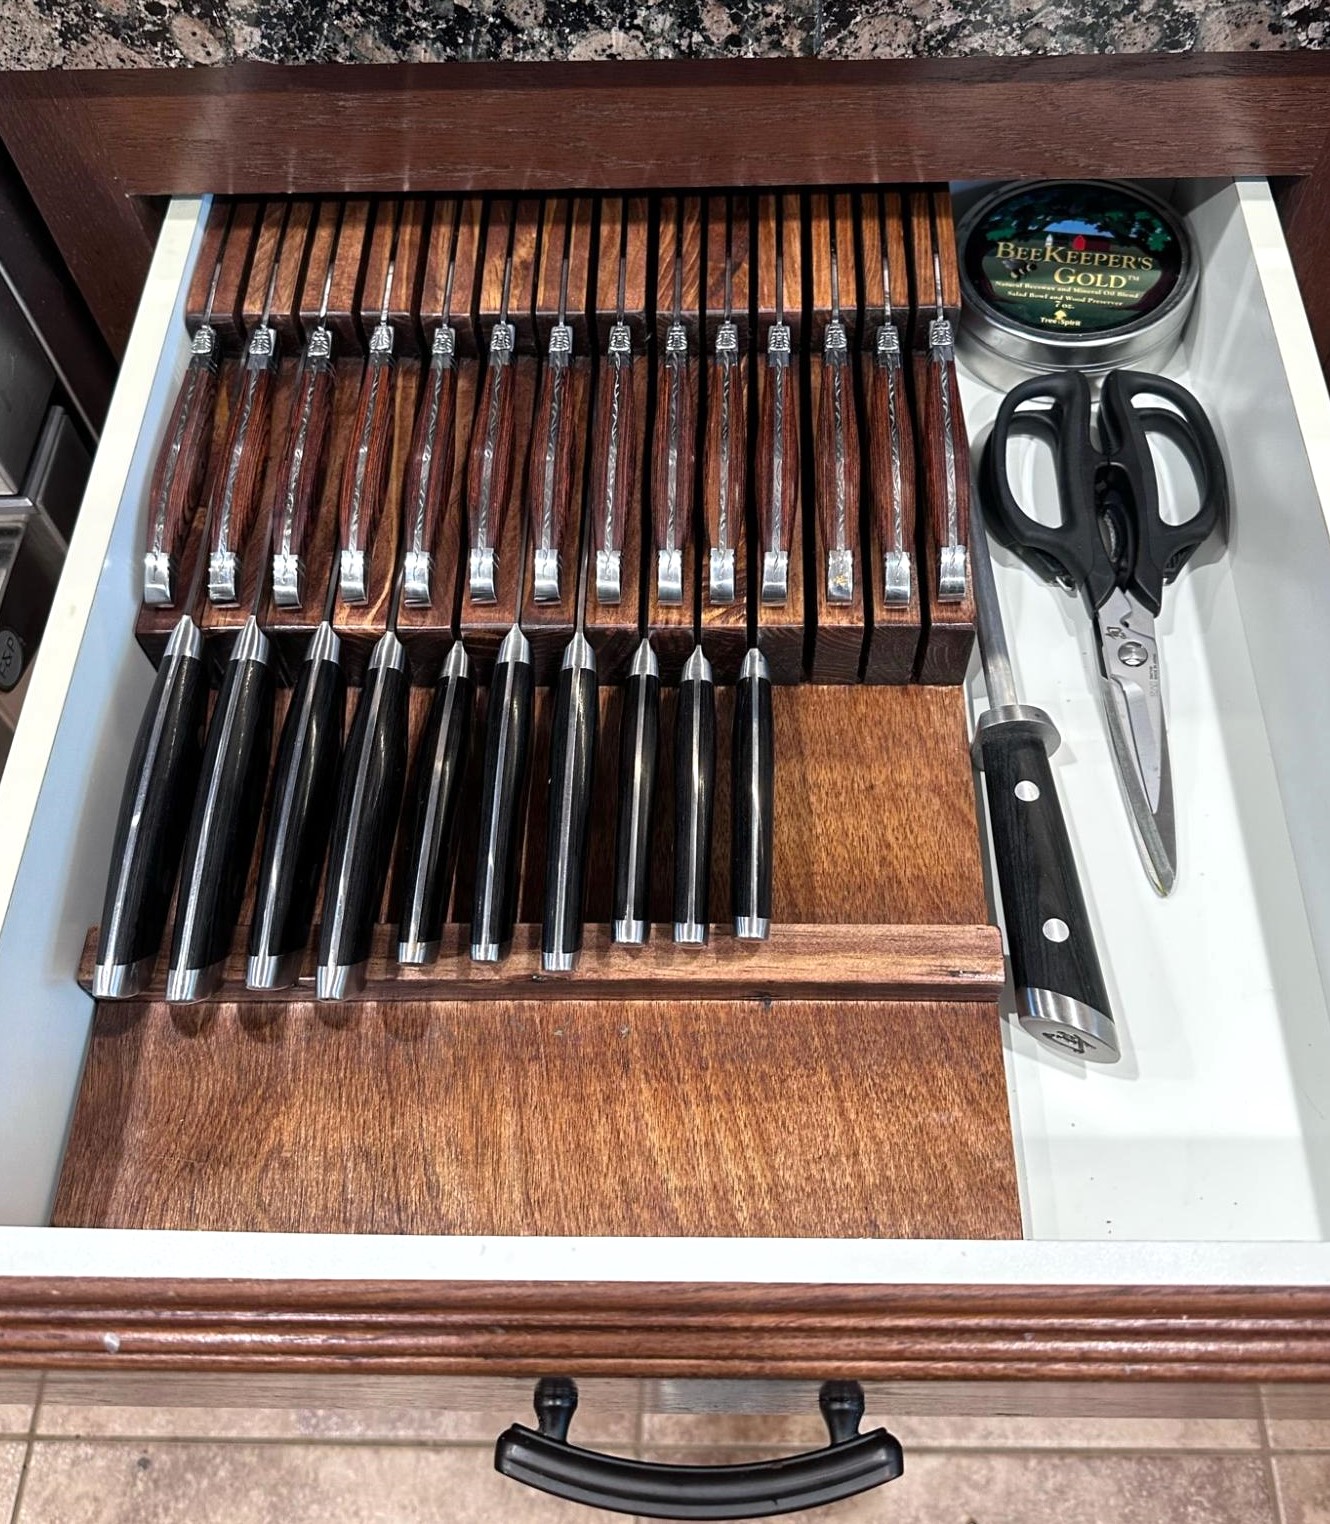
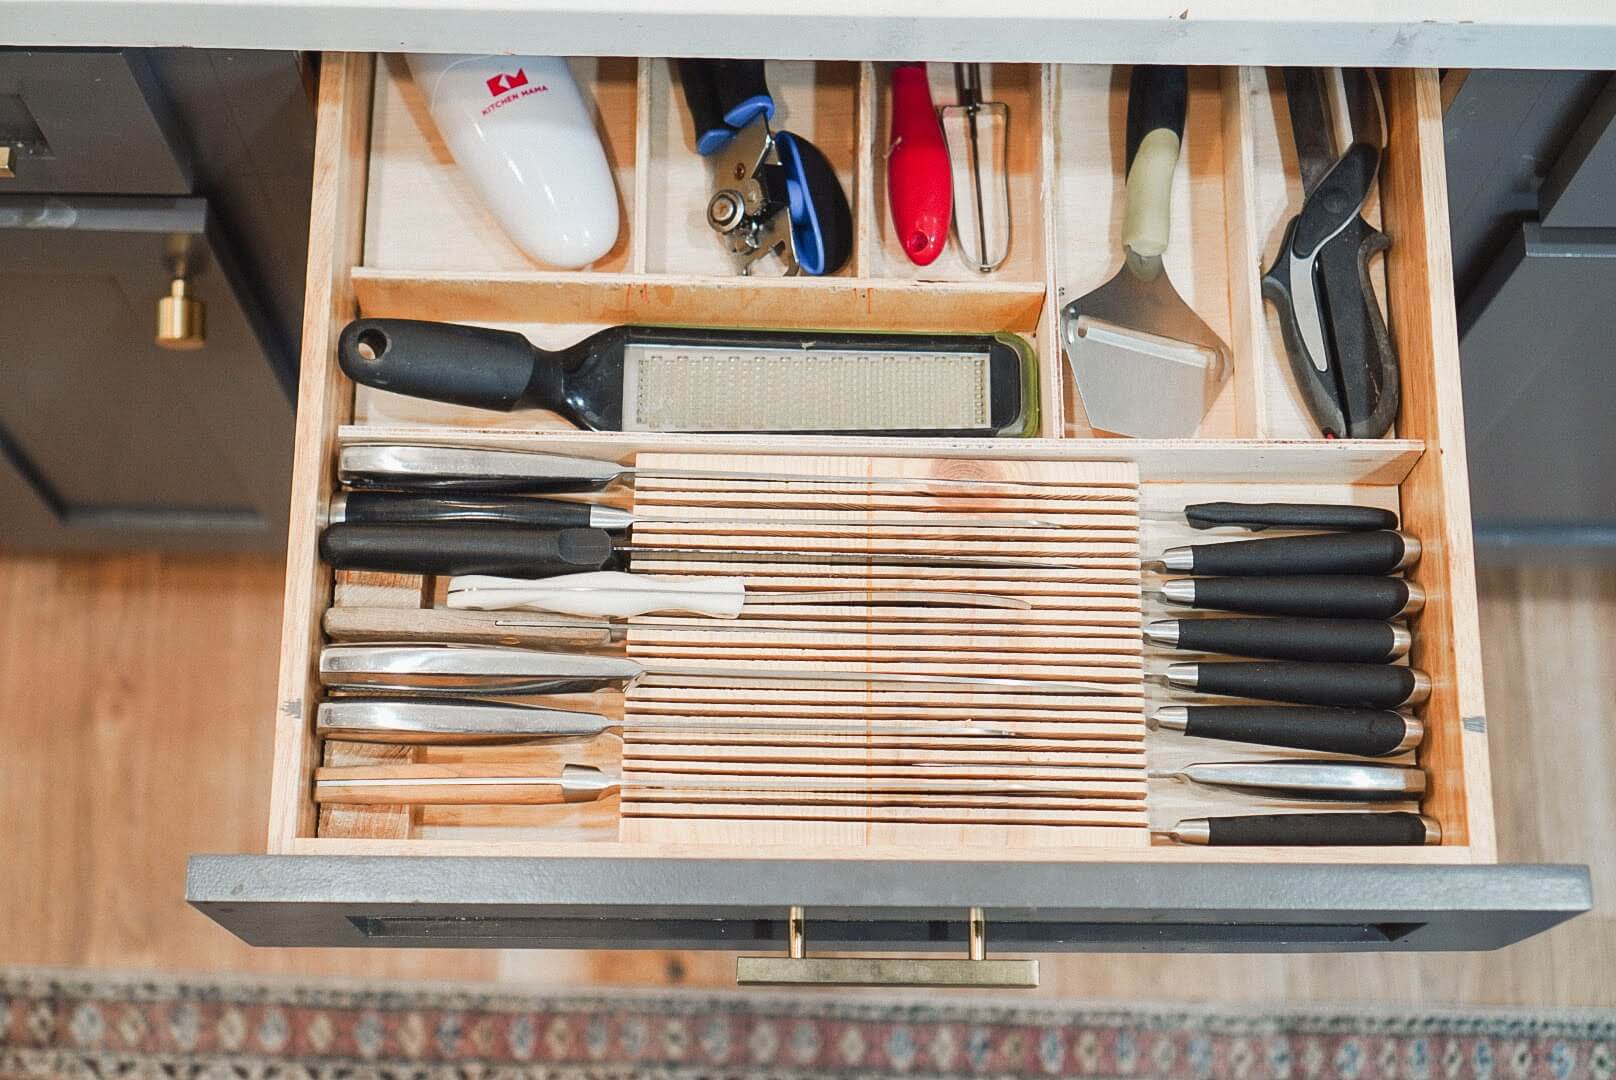
To keep your knives organized and secure, you will need to create individual slots within the drawer insert. Measure the length of each knife and mark evenly spaced intervals along the insert’s width, ensuring that the slots are wide enough to accommodate the blades without being too loose. Use a saw or a chisel to carefully cut along these markings, creating slots that are deep enough to hold the knives securely. Take caution during this step to avoid any accidental injuries.

Smoothing Out the Slots:
After creating the slots, it’s important to smooth out their edges to prevent any damage to the knife blades. Use sandpaper or a file to gently round the edges of each slot, ensuring that there are no sharp or jagged edges that could potentially harm the knives. Take your time with this step, as it will not only protect your cutlery but also make it easier to slide the knives in and out of the slots without any resistance.
Applying Non-Slip Liner or Cork Sheet:
To keep your knives from sliding around in the drawer and potentially causing accidents, it’s crucial to provide a non-slip surface. Cut a piece of non-slip liner or cork sheet to fit the bottom of the drawer insert. This liner will provide traction and prevent the knives from moving around when opening and closing the drawer. Simply place the liner or cork sheet at the bottom of the insert, ensuring a snug fit.

Test and Adjust:
Once you have completed the construction of your DIY knife drawer organizer, it’s time to test its functionality. Place your knives into the slots, ensuring that each one fits securely and doesn’t wobble or slide around. Open and close the drawer to check if the knives remain in place and if the organizer fits comfortably within the drawer. If necessary, make any adjustments by sanding down slots or adding additional non-slip material to improve stability.

Maintaining Your Knife Drawer Organizer:
Now that your knives are neatly organized, it’s important to maintain the cleanliness and functionality of your knife drawer organizer. Regularly clean the insert and liner to remove any debris or food particles that may accumulate over time. Inspect the slots for any signs of wear or damage, and make necessary repairs or replacements as needed. By taking proper care of your organizer, you can ensure that it continues to serve its purpose effectively for years to come.
Additional Steps for Creating a DIY Knife Drawer Organizer
- Securing the Organizer:
- Once you’ve ensured that the knife slots are properly cut and smoothed out, secure the drawer organizer in place within your kitchen drawer. If the fit is snug, it should stay in place on its own. However, you can use double-sided tape or small L-brackets to secure it further if necessary.
- Organizing Additional Utensils:
- Depending on the size of your drawer and the number of knives you have, you may have extra space around the knife slots. Consider adding compartments for other kitchen utensils such as forks, spoons, or scissors. You can create these compartments using additional dividers made from wood or plastic.
- Labeling or Identifying Slots:
- To make it easier to find the right knife quickly, you can label or identify each slot. You might use a permanent marker to write the type of knife (e.g., chef’s knife, paring knife) next to each slot or use small labels attached to the organizer.
- Customizing for Unique Knives:
- If you have knives with unique shapes or sizes, adjust the slot dimensions accordingly. Some knives may require wider or deeper slots to accommodate their blades comfortably and securely.

- If you have knives with unique shapes or sizes, adjust the slot dimensions accordingly. Some knives may require wider or deeper slots to accommodate their blades comfortably and securely.
Conclusion:
A DIY knife drawer organizer is a practical and cost-effective solution to keep your cutlery organized and your kitchen clutter-free. By following the simple steps outlined in this article, you can create a custom-made organizer that fits your drawer perfectly and ensures the safe storage of your knives. Remember to prioritize safety throughout the construction process and regularly maintain your organizer to prolong its lifespan. With a well-organized knife drawer, you’ll always have the right knife at your fingertips, making meal preparation a breeze.


