DIY Drawer Building: Mastering Slides for Smooth Operation
Building your own drawers can be a rewarding DIY project, whether you’re renovating furniture or creating custom storage solutions. One critical aspect of drawer construction is selecting and installing the right slides to ensure smooth operation and durability. In this comprehensive guide, we’ll delve into the world of DIY drawer building, focusing specifically on mastering slides for flawless functionality.

1. Understanding Drawer Slides
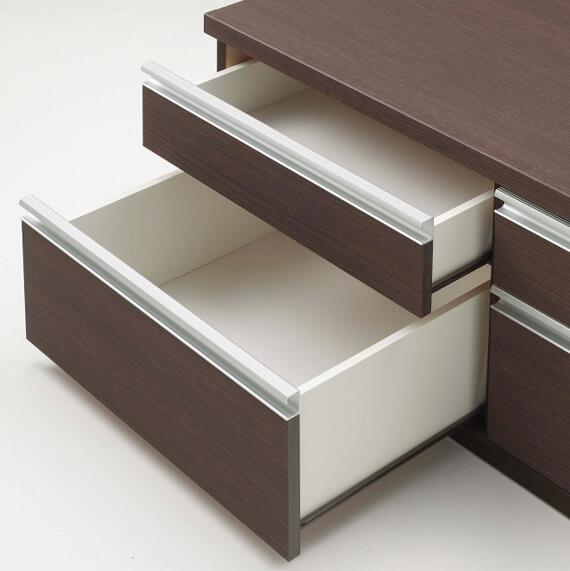
Before diving into the DIY process, it’s essential to understand the basic types of drawer slides available. The two main categories are side-mount slides and under-mount slides. Side-mount slides are attached to the sides of the drawer and the cabinet, while under-mount slides are concealed beneath the drawer and provide a sleeker look. Each type has its advantages and considerations, so it’s crucial to choose the option that best suits your project requirements and preferences.
2. Selecting the Right Slides
When selecting drawer slides for your DIY project, several factors come into play, including drawer size, weight capacity, and desired functionality. Consider the dimensions and weight of the items the drawer will hold to ensure the slides can support the load effectively. Additionally, evaluate whether you prefer full-extension slides for maximum access or partial-extension slides for more discreet storage. Take measurements carefully and choose slides that match the dimensions of your drawers and cabinet openings for a seamless fit.

3. Gathering Materials and Tools
Before beginning the installation process, gather all the necessary materials and tools for building and installing your drawers and slides. Depending on the type of slides you choose, you may need screws, mounting brackets, and other hardware. Basic tools such as a drill, screwdriver, level, and measuring tape are essential for accurate installation. Having everything organized and within reach will streamline the DIY process and ensure smooth progress from start to finish.
4. Preparing the Drawer and Cabinet
Proper preparation is crucial for successful drawer slide installation. Begin by assembling the drawer box according to your desired dimensions and construction method. Sand the edges and surfaces to ensure smooth operation and a professional finish. Next, measure and mark the placement of the slides inside the cabinet, taking into account any clearance requirements or adjustments necessary for alignment. Proper preparation will lay the foundation for precise installation and optimal functionality.

5. Installing Side-Mount Slides
For side-mount slides, start by attaching the slides to the sides of the drawer box using screws and a screwdriver or drill. Then, position the drawer inside the cabinet and align the slides with the corresponding marks. Secure the slides to the cabinet using screws, ensuring they are level and evenly spaced. Test the drawer’s movement to ensure smooth operation, making any necessary adjustments to the slides or alignment as needed. Proper installation is key to achieving effortless opening and closing of the drawer.
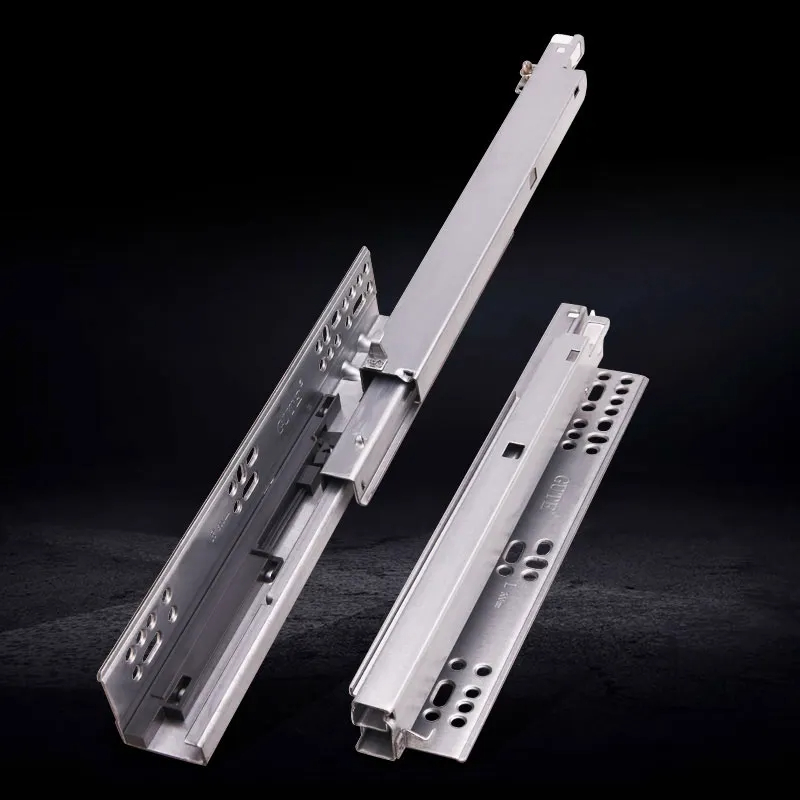
6. Installing Under-Mount Slides
Installing under-mount slides requires a slightly different approach but offers a sleeker look and smoother operation. Begin by attaching the slides to the sides of the drawer box, following the manufacturer’s instructions for proper positioning and alignment. Next, position the drawer inside the cabinet and align the slides with the corresponding brackets or mounting points. Secure the slides to the cabinet using screws or mounting brackets, ensuring they are level and properly aligned. Test the drawer’s movement to ensure smooth gliding action, adjusting the slides or alignment as necessary for optimal performance.
7. Fine-Tuning and Adjustments
Even after installation, it’s essential to fine-tune the slides and make any necessary adjustments to ensure flawless operation. Check for smooth movement and proper alignment, adjusting the slides or drawer position as needed to eliminate any sticking or binding. Lubricate the slides with a silicone-based lubricant to reduce friction and prolong their lifespan. Take the time to fine-tune every aspect of the drawer’s operation, from opening and closing to alignment and stability, for a professional-quality finish.
8. Adding Finishing Touches
Once the slides are installed and fine-tuned, add the finishing touches to complete your DIY drawer project. Consider installing drawer fronts or handles for a polished look and enhanced functionality. Sand and finish the surfaces of the drawer and cabinet to your desired specifications, whether painting, staining, or applying a protective coat. Take pride in your craftsmanship and attention to detail, knowing that you’ve mastered the art of drawer building and achieved smooth, reliable operation for years to come.
9. Maintenance and Care
To ensure the longevity of your DIY drawers and slides, practice regular maintenance and care. Periodically inspect the slides for signs of wear or damage, such as loose screws or misalignment, and make any necessary repairs or adjustments promptly. Keep the slides clean and free of debris by wiping them down regularly with a soft, damp cloth. Avoid overloading the drawers beyond their weight capacity, as this can strain the slides and compromise their performance over time. With proper maintenance and care, your DIY drawers will continue to provide smooth operation and reliable storage for years to come.

10. Enjoying the Fruits of Your Labor
With your DIY drawers successfully built and slides masterfully installed, take a moment to admire your handiwork and enjoy the fruits of your labor. Revel in the satisfaction of knowing that you’ve created custom storage solutions tailored to your exact specifications and preferences. Whether you’re organizing kitchen utensils, clothing, or office supplies, your DIY drawers are sure to enhance functionality and efficiency in your home. Sit back, relax, and appreciate the smooth, effortless operation of your meticulously crafted drawers, knowing that you’ve mastered the art of DIY drawer building with precision and skill.
11. Troubleshooting Common Issues
Despite careful planning and execution, it’s not uncommon to encounter some challenges during the DIY drawer building process. Common issues include misaligned slides, sticking drawers, or uneven movement. Fortunately, many of these problems can be addressed with simple troubleshooting techniques. For instance, if a drawer is sticking, check for obstructions or debris in the slides and clean them thoroughly. If slides are misaligned, loosen the screws slightly and adjust the position until they are level and parallel, then tighten the screws securely. By addressing issues promptly and methodically, you can ensure that your DIY drawers operate smoothly and reliably.
12. Customizing Drawer Functionality
One of the advantages of DIY drawer building is the ability to customize functionality to suit your specific needs and preferences. Depending on the purpose of the drawers, consider incorporating additional features such as soft-close mechanisms for quiet, gentle closing, or drawer dividers for enhanced organization. Explore innovative solutions such as pull-out shelves or hidden compartments to maximize storage and accessibility. By tailoring the design and features of your DIY drawers to your unique requirements, you can create custom storage solutions that enhance efficiency and convenience in your home.
13. Expanding Your DIY Skills
Building drawers and installing slides is just one aspect of DIY home improvement, and mastering these skills opens the door to countless other projects and opportunities. As you gain confidence and proficiency in drawer building, consider expanding your repertoire to tackle more ambitious endeavors such as building cabinets, constructing furniture, or renovating entire rooms. Invest in quality tools and resources, and don’t be afraid to experiment and learn from your mistakes along the way. With dedication and perseverance, you can continue to refine your DIY skills and tackle increasingly complex projects with ease and confidence.