Introduction: Tackling Drawer Slide Issues
Drawer slides are essential components of any cabinet or furniture piece with drawers, providing smooth and effortless movement. However, over time, drawer slides can wear out, become misaligned, or develop issues that hinder their functionality. While hiring a professional may seem like the best solution, many drawer slide problems can be addressed with some basic tools and DIY know-how. In this article, we’ll explore common issues with drawer slides and provide step-by-step instructions on how to fix them like a pro.
Understanding Drawer Slides: Types and Components
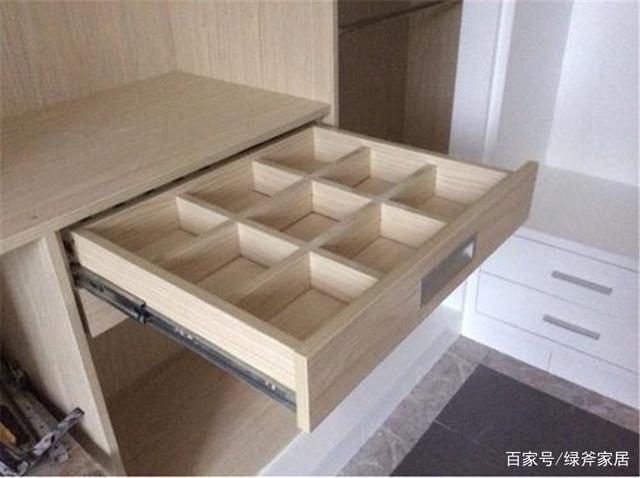
Before diving into repairs, it’s crucial to understand the different types of drawer slides and their components. The two most common types are side-mount slides, which attach to the sides of the drawer and cabinet, and undermount slides, which mount beneath the drawer for a sleek, concealed look. Drawer slides consist of several key components, including the slide tracks, rollers or ball bearings, and mounting brackets or screws. Familiarizing yourself with these components will make troubleshooting and repairs more manageable.
Diagnosing Common Problems: Identifying the Issue
The first step in fixing drawer slides is diagnosing the problem. Common issues include drawers that stick or bind when opening and closing, drawers that sag or fall out of alignment, and slides that are damaged or broken. By carefully inspecting the drawer slides and observing how the drawers behave, you can pinpoint the root cause of the problem and determine the appropriate course of action. Understanding the underlying issue is essential for implementing effective repairs and preventing future problems.

Tools and Materials: What You’ll Need
Before getting started, gather the necessary tools and materials for the job. Depending on the specific issue with your drawer slides, you may need a combination of the following:
- Screwdriver (Phillips or flat-head)
- Adjustable wrench or socket set
- Lubricant (such as silicone spray or white lithium grease)
- Pliers
- Replacement parts (if necessary, such as new slides or mounting hardware)
- Level
- Sandpaper or file (for smoothing rough edges)
Having these tools and materials on hand will ensure that you’re prepared to tackle any repair job that comes your way.
Fixing Sticky or Binding Drawers: Lubrication and Adjustment
Sticky or binding drawers are a common issue caused by friction between the drawer slides and the drawer itself. To fix this problem, start by removing the drawer from the cabinet and inspecting the slides for any debris or obstructions. Clean the slides thoroughly with a damp cloth to remove dirt, dust, and grease buildup. Next, apply a lubricant to the slides, focusing on areas where metal rubs against metal. Silicone spray or white lithium grease are ideal lubricants for drawer slides, as they provide long-lasting lubrication without attracting dirt or dust. Finally, test the drawer to ensure that it moves smoothly along the slides, making any necessary adjustments to the alignment or positioning of the slides as needed.
Repairing Sagging Drawers: Reinforcement and Support
Sagging drawers are often caused by worn or damaged slides, inadequate support, or excessive weight. To repair a sagging drawer, start by removing the drawer from the cabinet and inspecting the slides for signs of wear or damage. If the slides are in good condition, check the drawer itself for any signs of warping or damage. If the slides or drawer are damaged beyond repair, you may need to replace them with new components. In some cases, reinforcing the bottom of the drawer with additional support or bracing may help prevent future sagging. Once the necessary repairs or reinforcements have been made, reinstall the drawer and test it to ensure that it slides smoothly and evenly.
Replacing Damaged Slides: Step-by-Step Guide
If your drawer slides are damaged or broken beyond repair, you’ll need to replace them with new ones. Start by removing the drawer from the cabinet and unscrewing the mounting brackets or screws that secure the slides to the drawer and cabinet. Take note of how the old slides are installed, as this will help guide the installation of the new ones. Once the old slides have been removed, attach the new slides to the drawer and cabinet using the provided screws or mounting hardware. Make sure the slides are aligned properly and level with each other to ensure smooth operation. Finally, reattach the drawer to the slides and test it to ensure that it moves freely and without binding.
Preventive Maintenance: Tips for Long-Term Success
Once you’ve fixed your drawer slides, it’s essential to perform regular preventive maintenance to keep them in optimal condition. This includes periodically cleaning and lubricating the slides to prevent friction and wear, as well as inspecting the slides and drawers for any signs of damage or misalignment. Addressing minor issues promptly can help prevent more significant problems down the line and prolong the lifespan of your drawer slides. Additionally, avoiding overloading drawers with excessive weight and using them with care can help prevent premature wear and damage.
Advanced Techniques for Drawer Slide Maintenance
Beyond basic repairs, there are advanced techniques you can employ to ensure optimal performance and longevity of your drawer slides. These techniques involve more intricate adjustments and modifications to address specific issues and enhance overall functionality.
1. Adjusting Drawer Alignment: Precision and Balance
Drawer alignment is crucial for smooth operation and prevents issues such as sticking, binding, or uneven movement. If you notice that your drawers are misaligned, causing them to rub against the cabinet or each other, you can make precise adjustments to correct the alignment. This may involve loosening mounting screws slightly, shifting the position of the slides, and tightening the screws once the drawer is properly aligned. Using a level to ensure that the drawer is balanced horizontally and vertically can help achieve optimal alignment.

2. Retrofitting Soft-Close Mechanisms: Adding a Touch of Luxury
Soft-close mechanisms are a popular feature in modern drawers, providing a gentle, controlled closing action that prevents slamming and reduces wear on the slides. While many newer drawer slides come equipped with built-in soft-close mechanisms, you can retrofit older slides with aftermarket soft-close adapters for added convenience and luxury. These adapters install easily and typically consist of hydraulic dampers or spring-loaded mechanisms that slow the drawer’s movement as it closes, creating a quiet, cushioned finish.
Conclusion: Mastering Drawer Slide Repairs
In conclusion, fixing drawer slides is a manageable DIY task that can save you time and money compared to hiring a professional. By understanding the components of drawer slides, diagnosing common problems, and following step-by-step instructions, you can tackle issues like a pro and restore functionality to your drawers with ease. Whether you’re dealing with sticky drawers, sagging drawers, or damaged slides, armed with the right tools and know-how, you can successfully repair your drawer slides and keep them operating smoothly for years to come.