Choosing the Right Type of Paint for Kitchen Cabinets
Choosing the correct kitchen cabinet paint is crucial for durability and aesthetics. Paint types vary in their properties and finishes, affecting the final look and maintenance of your cabinets. Let’s take a look at different paint types and their best use-cases for kitchen cabinets.
Oil-Based Paints: They offer a hard, durable finish, suitable for cabinets exposed to heavy use. They take longer to dry and have a strong odor, but they’re resistant to stains and scratches. However, oil-based paints may yellow over time, especially in areas with low natural light.
Latex-Based Paints: These are water-ba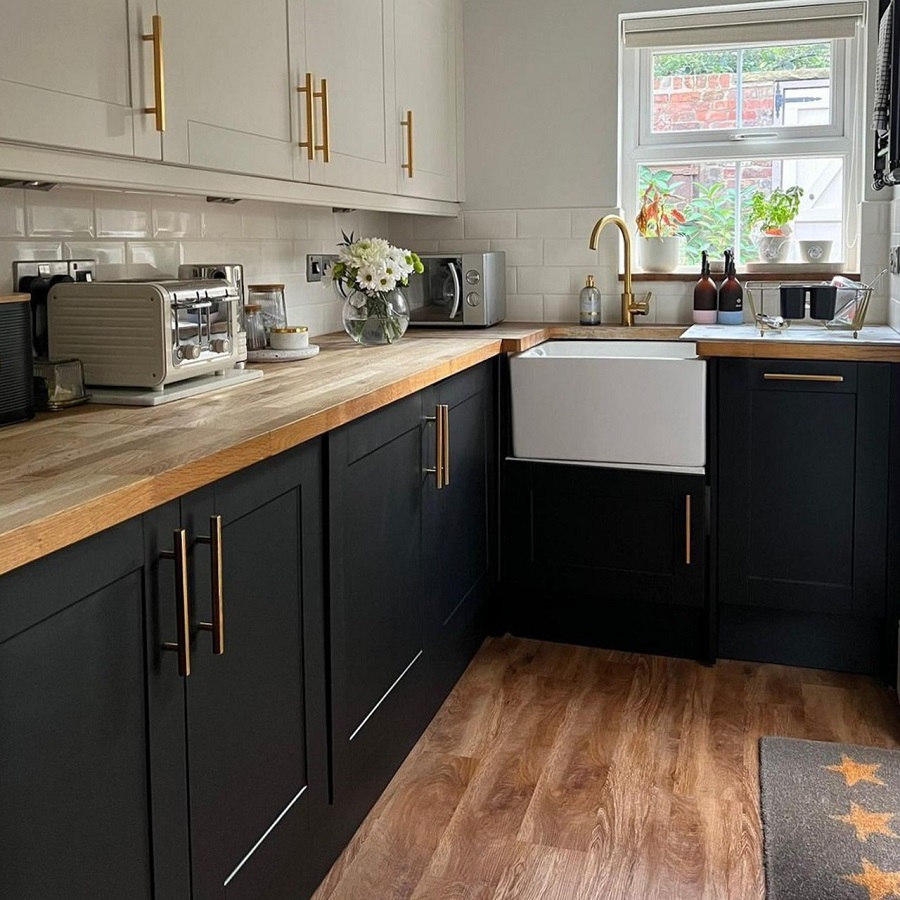 sed and have a quicker drying time. They emit less odor and are easier to clean up. Latex paints are less likely to yellow and are environmentally friendly. However, they may not be as durable as oil-based paints.
Acrylic Enamel Paint: For a long-lasting, easy-to-clean surface, acrylic enamel is a good choice. It can mimic the hardness of oil-based paints while maintaining the benefits of water-based paints.
Alkyd Paint: Alkyd paints offer a durable surface that’s less prone to chipping. They have qualities similar to oil- based paints but with easier cleanup and faster drying times. When using alkyd paint, it’s important to have good ventilation.
When selecting kitchen cabinet paint, consider the cabinet’s usage, your kitchen’s style, and the amount of maintenance you’re willing to do. A semigloss or gloss finish is often recommended for kitchen cabinets because of its ease of cleaning and resistance to moisture. If you prefer a matte look, ensure you choose a product specifically designed for kitchen cabinets to withstand cleaning and contact with oils.
Select a paint that caters to your kitchen’s needs and your personal preferences for the best results. Remember that prep work and primer choice are also key factors for a successful painting project.
Preparing Your Cabinets for Painting
Preparing your cabinets for painting is a critical step. It ensures that your kitchen cabinet paint adheres well and lasts long. Follow these steps for the best prep results:
Remove Hardware and Contents: Start by taking off hinges, knobs, and pulls. Empty the cabinets completely. This step gives you access to all surfaces and edges.
Clean Surfaces Thoroughly: Years of grease and grime can affect paint adhesion. Use a degreaser or a mild detergent to clean all surfaces. Rinse with water and allow them to dry.
Sand the Cabinets: Lightly sand the cabinet surfaces. This roughens them up slightly, improving paint grip. A fine-grit sandpaper works well. After sanding, wipe the dust away with a damp cloth.
Apply Primer: Choose a primer suitable for your paint type. Oil-based primer works well with oil paints, while latex primers match latex paints. Priming helps paint stick better and ensures a uniform color.
Tape Off Areas: Use painter’s tape to protect walls and countertops. Tape off any areas that you don’t want to get paint on. Attention to detail here prevents messy edges.
Check for Repairs: Inspect for any cracks or damages. Fill these in with wood filler if necessary. Smooth out the filler before it dries.
Taking your time in the preparation phase pays off with professional-looking results. These steps create the ideal canvas for your new kitchen cabinet paint job.
Step-by-Step Guide to Painting Kitchen Cabinets
Painting kitchen cabinets can refresh your space. Follow these steps to ensure a stellar result.
Start with a Clean, Empty Space
Remove everything from your kitchen cabinets. Clear countertops to give yourself room to work.
Remove Doors and Hardware
Take off cabinet doors and remove hardware like handles and hinges. Keep screws and small parts in bags.
Protect Your Kitchen
Lay down drop cloths. Use painter’s tape to cover walls and countertops.
Sand and Clean Surfaces
Sand cabinet surfaces with fine-grit paper to help the paint adhere better. Wipe off the dust.
Prime the Cabinets
Apply a primer to prepare the surfaces for painting. Let it dry as recommended.
Paint the Cabinets
Brush or roll on your selected kitchen cabinet paint. Start with the back of the doors. Let each coat dry and lightly sand between layers.
Let Everything Cure
After the final coat, wait for the paint to fully cure. This may take a few days.
Reassemble and Enjoy
Reattach doors and hardware. Enjoy your newly painted kitchen cabinets!
By following these steps, you’ll give your kitchen a fresh, updated look with beautifully painted cabinets. Use kitchen cabinet paint that suits your style and needs.
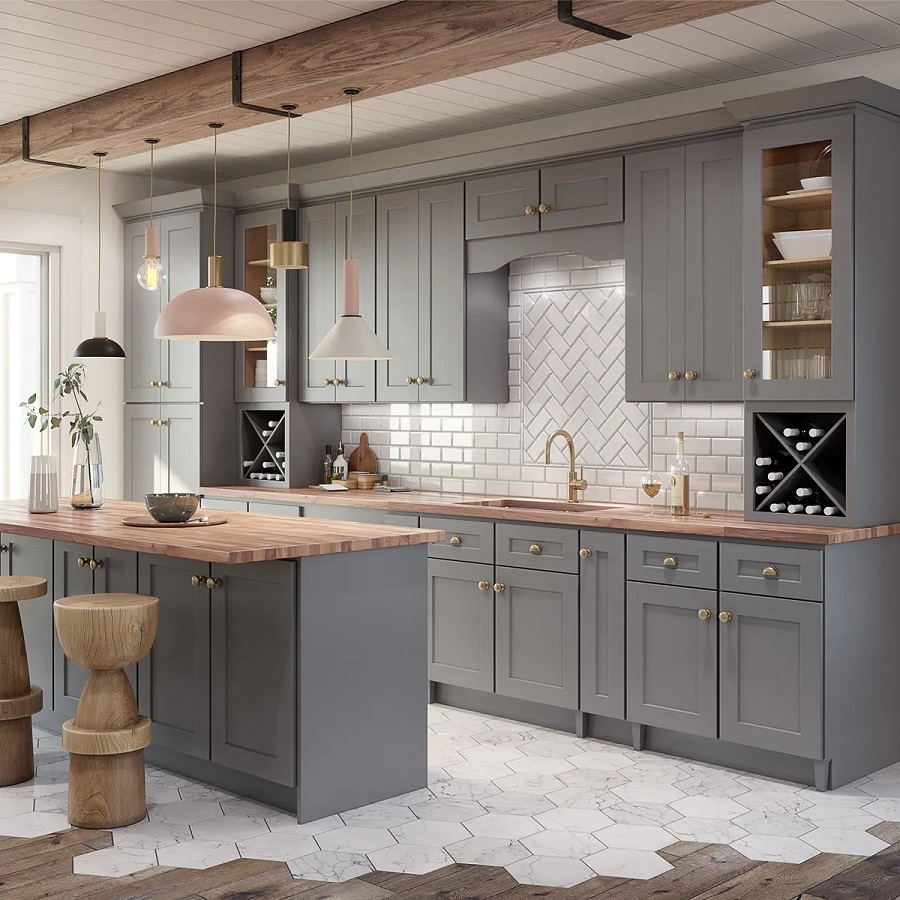
Top Colors and Finishes for Kitchen Cabinet Painting
When updating your kitchen, the choice of color and finish for your cabinets can completely transform the space. The right selections will enhance the room’s aesthetics and affect how long your paint job will last. Here’s a guide to the top colors and finishes to consider for your kitchen cabinet paint.
Popular Colors:
- Classic White: White cabinets offer a timeless look and can brighten up any kitchen.
- Soft Gray: Gray adds a modern touch while still being neutral.
- Navy Blue: This deep color brings elegance and a pop of color without overwhelming the space.
- Sage Green: For a natural and serene ambiance, sage green is a trending choice.
- Black: Bold and sleek, black cabinets make a dramatic statement.
Finishes to Choose From:
- Glossy Finish: High gloss is durable, easy to clean, and reflects light, making your kitchen appear larger.
- Semi-Gloss Finish: A popular choice for its balance between shine and easy maintenance.
- Satin Finish: Offers a soft sheen that’s more forgiving of imperfections.
- Matte Finish: Provides a modern look and hides fingerprints but may show smudges more.
Mix and match colors and finishes that align with your personal style and kitchen’s design theme. Remember that light colors can make small kitchens feel larger, and dark colors work well in spacious rooms with lots of natural light. Always consider the finish based on how much use your kitchen gets and how much upkeep you’re willing to perform. Happy painting!
Maintenance Tips for Newly Painted Cabinets
Once you’ve transformed your kitchen cabinets with fresh paint, proper care is essential for longevity. Here are a few maintenance tips to keep them looking their best.
Clean Gently: To maintain the color and finish, use a soft cloth or sponge with mild soap and warm water. Avoid abrasive cleaners that could damage the paint.
Touch Up as Required: Keep a small amount of your kitchen cabinet paint on hand for quick touch-ups. Attend to chips or scratches quickly to prevent further damage.
Avoid Moisture: Moisture can harm the finish. Wipe up spills promptly and ensure the room is well-ventilated to prevent moisture build-up.
Use Protectants: Consider using wax or a non-abrasive polish to add a protective layer. This helps shield cabinets from dirt and fingerprints.
Regular Checks: Inspect your cabinets periodically. Catching issues early can save time and maintain the appearance.
Be Mindful with Hardware: When replacing knobs or handles, avoid overtightening as this can crack the paint.
Remember, the key to maintaining newly painted kitchen cabinets is a gentle approach and preventive care. By following these tips, you’ll enjoy a fresh-looking kitchen for years to come.
The Impact of Painted Cabinets on Kitchen Aesthetics
Painting your kitchen cabinets can have a dramatic effect on the look and feel of the room. The color and finish of your kitchen cabinet paint can completely refresh the space. It adds personality and sets the tone for the entire kitchen.
Create a Focal Point
Bright or bold paint colors can turn cabinets into a striking focal point. This draws the eye and anchors the room’s design.
Enhance Room Size Perception
Lighter colors can make a small kitchen feel more spacious. They reflect light and give an airy, open sensation.
Mood Setting
Color choice greatly impacts the mood of your kitchen. Cool tones can create a calming effect, while warm colors might add coziness.
Emphasize Your Style
The paint finish you choose can complement your design style. Glossy finishes suit modern aesthetics, whereas matte might lean towards a traditional or rustic look.
Increase Property Value
A well-executed cabinet paint job can increase your home’s appeal to potential buyers. It demonstrates the care put into home maintenance.
Overall, the paint on kitchen cabinets plays a key role. It dictates the aesthetics and sets the stage for the entire kitchen experience. Choose wisely to make the most impact. Remember to pair your color and finish choice with the room’s natural light and size for the best effect.
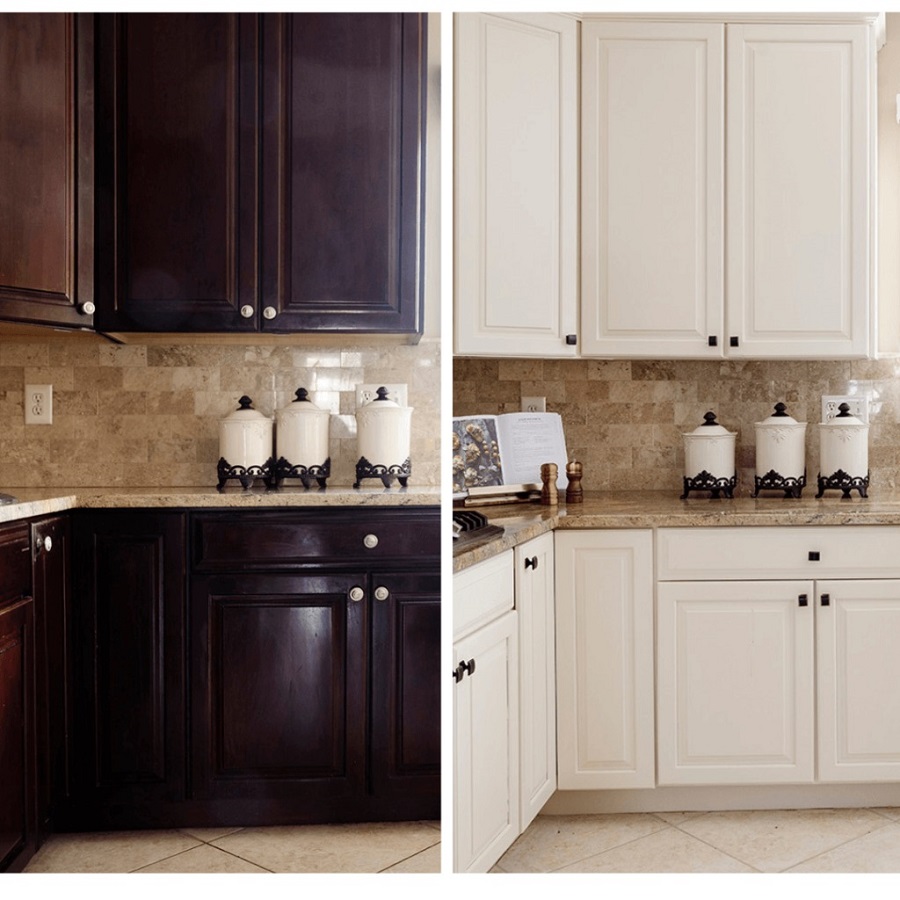
Cost Analysis: Professional Painting vs. DIY
When considering a kitchen upgrade, many weigh the costs between hiring professionals and tackling cabinet painting themselves. Here’s a comprehensive cost analysis to help you decide.
Initial Cost Outlay
DIY Approach: Buying your own kitchen cabinet paint and tools may seem cheaper initially. Remember to account for primer, brushes, rollers, and sandpaper.
Professional Service: A professional job can cost more upfront. They provide paint, labor, tools, and expertise.
Time Investment
DIY: Your time is valuable. DIY painting takes hours or days, factoring in prep, painting, and drying.
Professional: Professionals work efficiently, but you’ll need to accommodate their schedule.
Skill Level and Quality
DIY: If you’re experienced, you might achieve a solid result. Newbies face a learning curve.
Professional: Experts deliver a high-quality finish, often with guarantees.
Long-Term Costs
DIY: Mistakes can lead to additional costs for fixes or repainting sooner than expected.
Professional: A professional job can last longer, reducing the frequency of repainting.
Overall Value
DIY: The satisfaction of personal accomplishment, plus potential savings.
Professional: Peace of mind knowing it’s done right, and saved personal time.
Consider both paths for kitchen cabinet painting before deciding. Factor in your skill, time, and budget to determine the best option for you.
Common Mistakes to Avoid When Painting Kitchen Cabinets
Painting your kitchen cabinets can immensely upgrade your space, but common mistakes can lead to less-than-desirable results. To ensure that your kitchen cabinet paint job looks professional and lasts, steer clear of the following errors.
Skipping Preparation: Never jump into painting without proper prep. Cabinet surfaces need cleaning, sanding, and priming to ensure paint adheres well.
Choosing the Wrong Paint: Select kitchen cabinet paint that’s durable and suitable for the kitchen’s environment. The wrong type may not withstand daily use.
Ignoring the Primer: A primer is essential for a uniform and stable base. Skipping this step can lead to peeling and uneven color.
Rushing the Process: Good things take time. Rushing through the steps can cause imperfections. Allow paint to dry fully between coats.
Applying Thick Coats: Thick layers of paint may seem like a time-saver, but they lead to drips and long drying times. Thin, even coats are best.
Overlooking Hardware: Removing hardware is crucial for a clean look. Painting over hinges and handles is a definite no-no.
Using Poor Quality Tools: Invest in good brushes and rollers. Poor quality tools can leave streaks and bristles in the paint.
Neglecting the Details: Pay attention to edges and corners. Neatness counts for a polished finish.
Forgetting Ventilation: Kitchen cabinet painting requires good air circulation. Ventilate the area to avoid fumes and help paint dry.
By avoiding these common mistakes, your kitchen cabinet paint job will come out looking fantastic and enduring. Always take your time for preparation, choose the right materials, and focus on the finer details for the best outcomes.

