Introduction to DIY Jewelry Drawer Organizers
DIY jewelry drawer organizers offer a smart, customizable way to store your cherished jewelry pieces. Creating your own organizer allows you to tailor the storage space to fit your specific needs. This approach not only saves money but also encourages you to engage creatively in the design process. Whether it’s a simple drawer insert or a more elaborate setup with sliding trays, the possibilities are endless. In the following sections, we will explore the numerous benefits of having an organized jewelry storage system, what materials work best, and provide a step-by-step guide on how you can create your very own DIY jewelry drawer organizer. By the end, you’ll see just how impactful a well-organized jewelry drawer can be in maintaining the condition and accessibility of your jewelry collection.
Benefits of Organized Jewelry Storage
Organizing your jewelry has many advantages. Proper storage can prevent tangles and damage, especially to delicate pieces. It can also make it easier to find the exact item you want to wear. With everything in its place, you save time and avoid the frustration of searching through a cluttered pile. Moreover, an organized jewelry drawer protects your valuables from dust and potential loss. It can even prolong the life of your jewelry by preventing scratches and keeping pieces from rubbing against each other. Lastly, well-arranged jewelry can be a beautiful display in your home, adding a touch of elegance to your space.
Choosing the Right Materials for Your Organizer
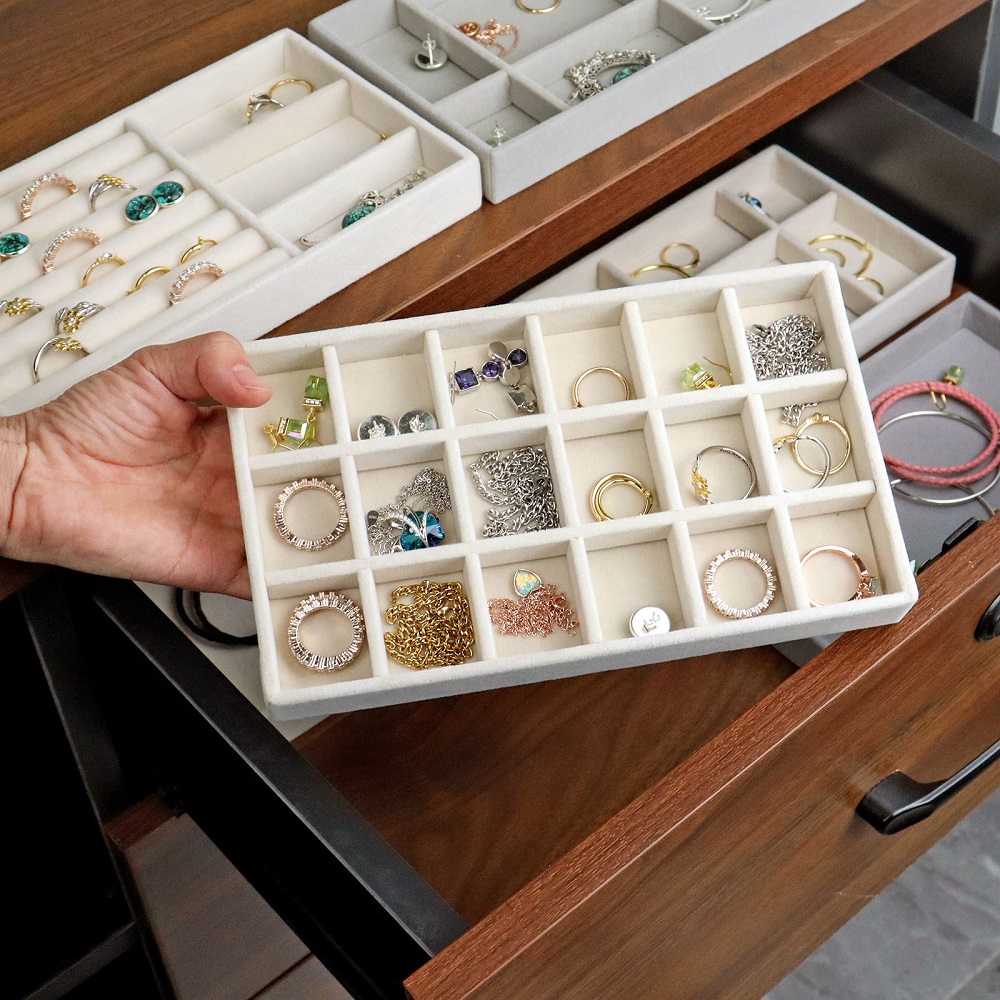
When constructing your diy jewelry organizer drawer, the selection of materials is paramount. Your choice of materials will determine the organizer’s durability, look, and feel. Here’s a breakdown of options to consider:
- Wood: A sturdy base for frames, dividers, and trays. Plywood is budget-friendly while hardwoods offer a polished look.
- Velvet: Ideal for lining trays and compartments. Velvet protects jewelry from scratches and adds a touch of luxury.
- Cardboard: Useful for creating lightweight dividers or a base. Ensure it’s sturdy enough to hold its shape.
- Stain and Paint: Wood stain enhances the natural grain, while paint can add a pop of color.
- Adhesives: Spray adhesive can secure fabric linings smoothly, while a glue gun offers strong bonds for assembly.
- Hardware: Items like drawer slides, mending plates, and hinges add functionality and support.
By choosing the right materials, you assure your diy jewelry organizer drawer is not only functional but also complements your interior decor. Remember to take measurements of your drawer space before starting to ensure everything fits perfectly. Your organizer should protect your beloved jewelry while integrating seamlessly into your home environment.
Step-by-Step Guide to Crafting Your Jewelry Drawer
Creating your own DIY jewelry organizer drawer can be a rewarding project. Here’s a simple guide to help you get started:
- Measure Your Drawer: Start by measuring the interior of your drawer. This will determine the size of the organizer.
- Design Your Layout: Sketch a layout of how you want your organizer to look. Include sections for different types of jewelry such as rings, bracelets, and necklaces.
- Cut Your Materials: Based on your design, cut wood for frames and dividers. Plywood can be a cost-effective choice.
- Construct the Frame: Use nail or glue gun to assemble the wooden frame. Ensure all corners are square for a snug fit in the drawer.
- Paint or Stain: Apply your chosen paint or stain to the wood. Let it dry completely before the next step.
- Line with Velvet: Cut velvet to line the frame and dividers. Use spray adhesive for a smooth finish.
- Install Dividers: Place dividers based on your layout. Secure them with a glue gun. Ensure dividers are spaced properly.
- Final Assembly: Insert the completed organizer into your drawer. Make sure it fits perfectly.
- Add Your Jewelry: Arrange your jewelry neatly in the new organizer. Admire your handiwork and enjoy easy access to your organized jewelry.
By following these steps, your DIY jewelry organizer drawer will not only function well but also look great. It’s a practical project that enhances the organization and appearance of your jewelry collection.
Design Tips for Maximizing Space and Accessibility
When setting up your DIY jewelry organizer drawer, space optimization and accessibility are crucial. Here are several design tips to help you make the most out of your available space while ensuring every piece of jewelry is easily accessible:
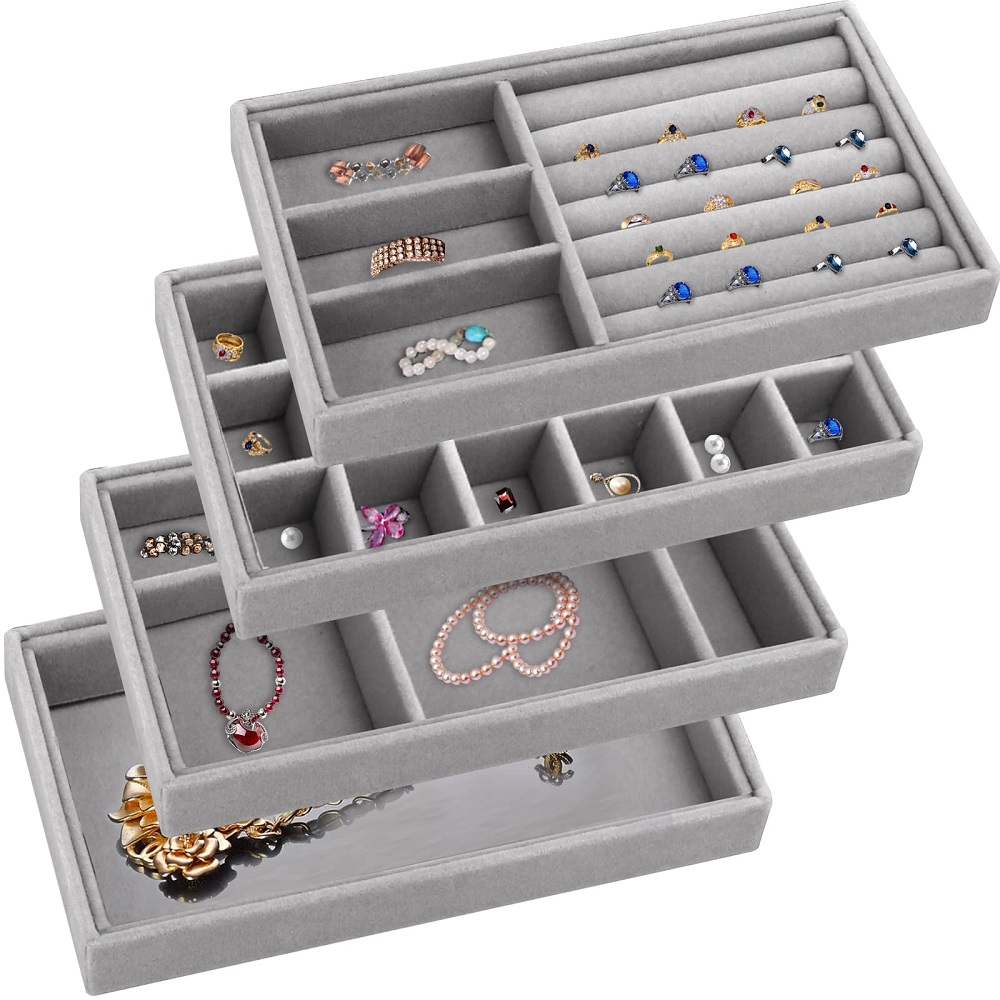
- Utilize Vertical Space: Consider stacking multiple levels of trays if drawer depth allows. Sliding mechanisms can help access lower trays without hassle.
- Customizable Dividers: Create adjustable dividers. This flexibility allows you to adjust compartment sizes based on your changing jewelry collection.
- Clear Visibility: Use shallow compartments. They make it easier to see and retrieve your jewelry, preventing pieces from hiding behind each other.
- Accessibility: Ensure that all items are easy to reach. Place frequently used jewelry in the most accessible spots.
- Label Sections: Consider labeling each section. This method helps quickly identify where specific items are located, simplifying your routine.
- Innovative Materials: Think beyond wood and velvet. Explore clear acrylic for a modern look and enhanced visibility of contents.
Implementing these design tips will greatly improve the functionality of your DIY jewelry organizer drawer, providing a hassle-free way to store and access your jewelry.
Creative Divider and Compartment Solutions
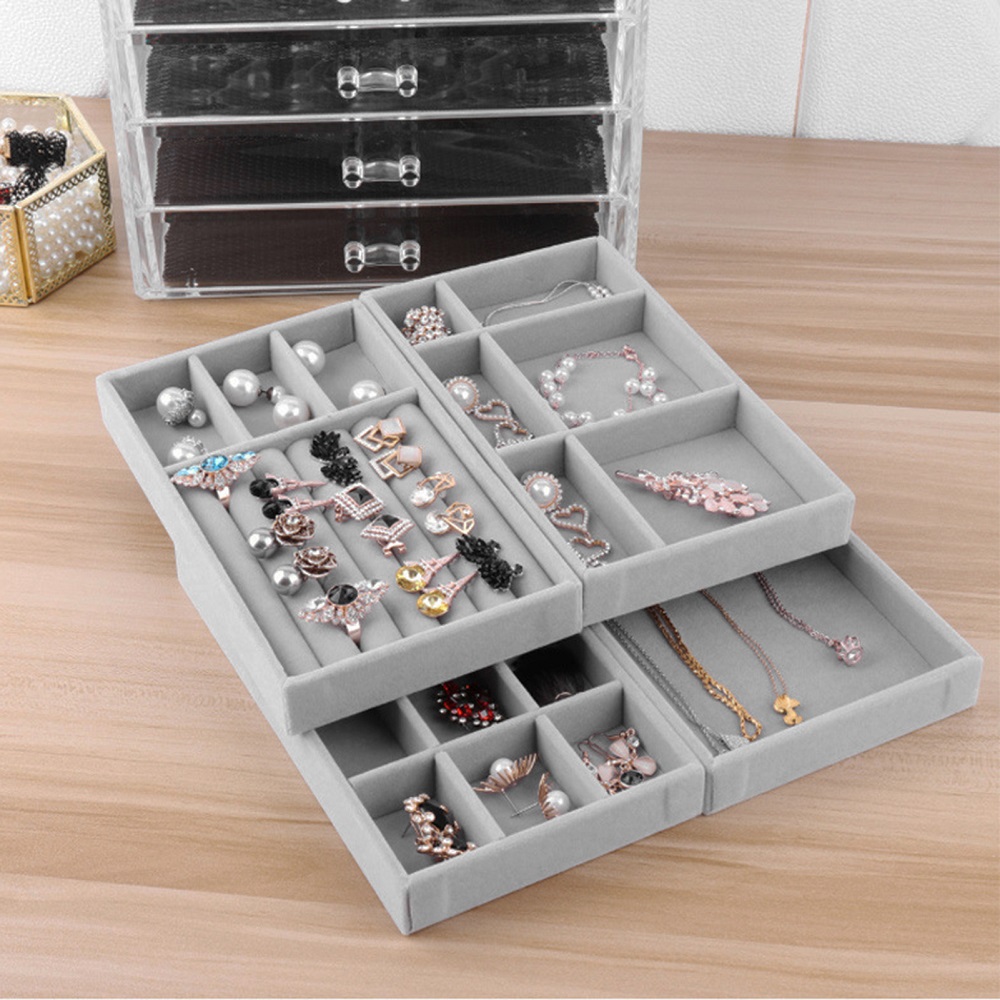
When it comes to custom DIY jewelry drawers, creative dividers are key. They help keep each piece of jewelry safe and separate. Below are some innovative solutions that can transform any drawer into a jewelry haven.
- Adaptive Sectioning: Use movable dividers. This allows for changing space sizes as your jewelry collection evolves.
- Ring Rolls: Create soft rolls covered in velvet for storing rings. This prevents scratching and makes them easy to grab.
- Angled Dividers: Try angled sections for bracelets. This can showcase them better and make it easier to pick one out.
- Layered Trays: If space permits, stack trays with a sliding mechanism. This can double the storage while using the same footprint.
- Hidden Compartments: Consider a secret bottom layer. It’s perfect for valuable pieces you wish to keep out of sight.
- Earring Boards: Install vertical boards with rows of small holes. This can hold stud earrings perfectly, making them visible and organized.
- Necklace Hooks: Add small hooks on the side or top of the drawer. These are great for hanging necklaces and preventing tangles.
- Custom Shapes: Cut dividers to fit the shapes of your unique pieces. Custom spaces can be made for watches or large pendants.
- Transparent Tops: Use clear acrylic lids on sections. They protect while allowing you to see inside without opening.
These solutions not only increase the efficiency of your space but also add a personalized touch. With the right mix of dividers and compartments, your jewelry drawer will become a perfect blend of form and function.
Maintaining and Caring for Your DIY Jewelry Organizer
Once you’ve created the perfect DIY jewelry organizer drawer, it’s vital to maintain and care for it to keep your jewelry in top shape. Here are some practical tips to ensure your organizer stays beautiful and functional:
Regular Cleaning
- Wipe Down Surfaces: Use a soft cloth to gently clean wood and velvet. Dust often to prevent buildup.
- Spot Clean Stains: Address spills and stains on velvet quickly to avoid permanent marks.
Keep It Dry
- Avoid Moisture: Ensure your jewelry and organizer stay dry. Humidity can damage both jewelry and materials.
Tidy-Up Routine
- Reorganize Often: As you wear and buy new jewelry, reorganize your compartments. This keeps everything accessible.
- Check for Wear: Look out for any wear on dividers and linings. Repair or replace as needed.
Protect from Damage
- Soft Handling: Open and close drawers gently to prevent jarring. This can dislodge or scratch jewelry.
- Avoid Overloading: Don’t overcrowd sections. This puts stress on dividers and can tangle jewelry.
Periodic Assessments
- Review Contents: Go through your jewelry every few months. Decide what to keep, fix, or donate.
- Update Organization: Change your layout if needed. Your collection and needs might change over time.
By incorporating these care practices, your DIY jewelry organizer drawer will continue to safeguard your beloved jewelry assortment efficiently.
Conclusion: The Impact of a Well-Organized Jewelry Drawer
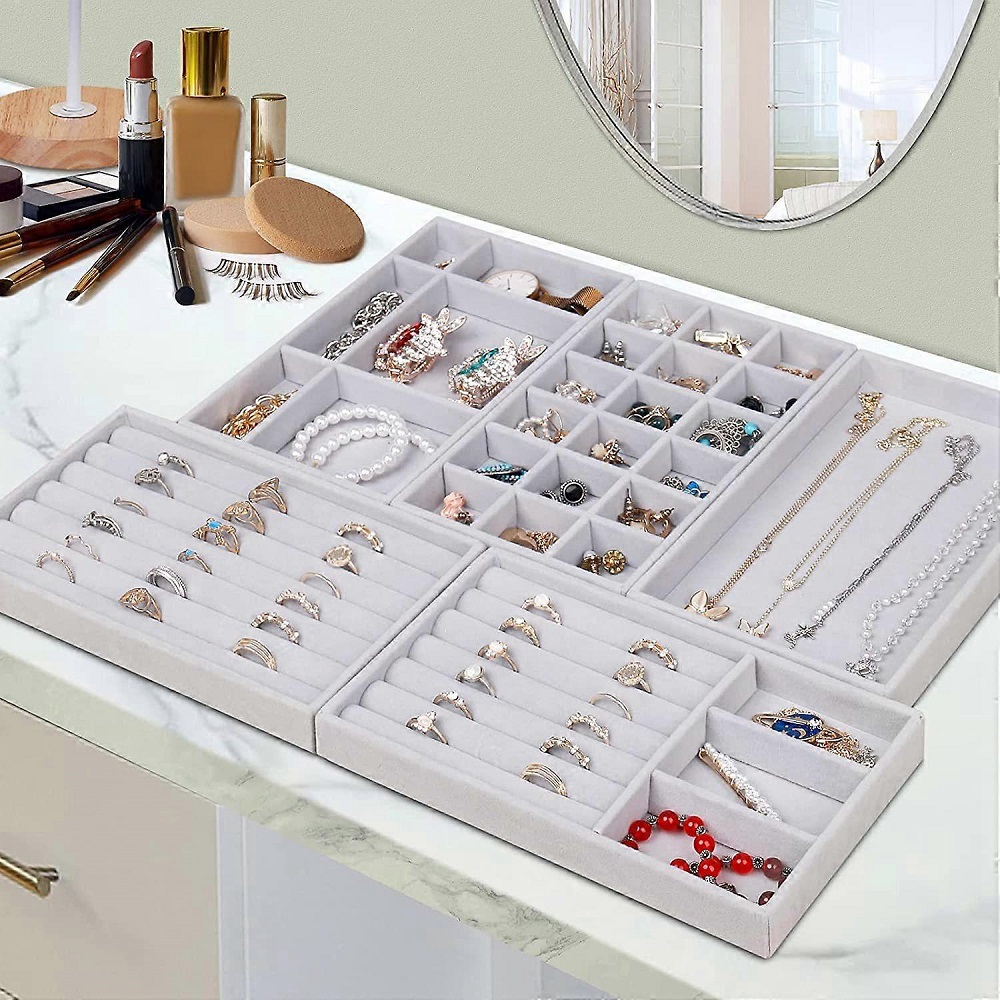
A well-organized jewelry drawer offers more than just order. It enhances your daily routine, making selecting your accessories a breeze. With a diy jewelry organizer drawer, every piece has its place, reducing clutter and preventing damage. Your organized drawer becomes a time-saver, no longer requiring you to untangle necklaces or search for a matching earring pair.
This tailored storage system also brings peace of mind. Knowing that your valuable and sentimental pieces are neatly stored and protected adds to a sense of well-being. The personal touch of a diy jewelry organizer drawer reflects your style and respects your beloved collection.
Moreover, the upkeep is simple. Regular cleaning keeps your organizer looking new, while maintenance ensures longevity. With proper care, your jewelry, as well as the organizer itself, will remain in pristine condition for years to come.
By creating a custom diy jewelry organizer drawer, you invest in the care of your jewelry. This project not only supports your accessories but also adds an element of elegance to your living space. Ultimately, the comfort and aesthetics provided by an organized drawer signify its undeniable impact on both your treasures and your daily life.
