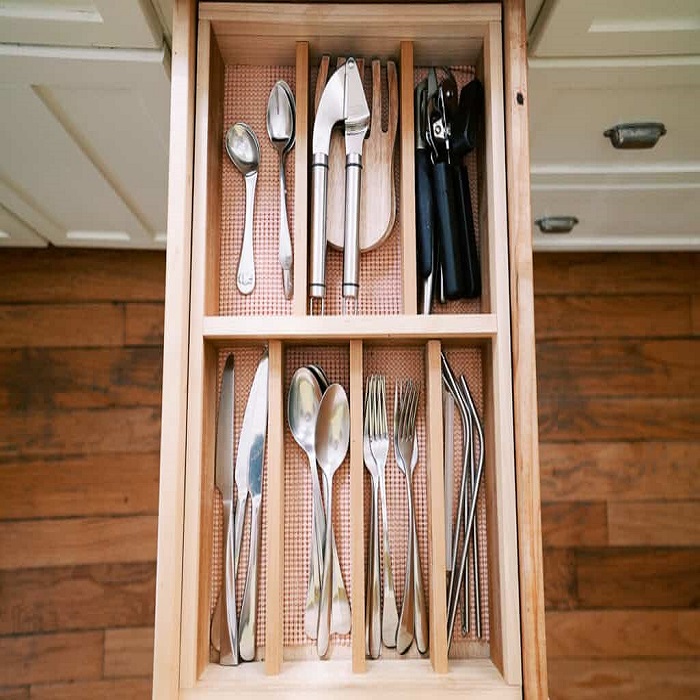
Introduction to DIY Silverware Drawer Organizers
Transforming your kitchen drawer into an efficient and organized space can be both rewarding and economical. Instead of tolerating a chaotic drawer full of jumbled silverware, consider creating your own DIY silverware drawer organizer. This approach not only tailors the storage to your specific needs but also adds a personal touch to your kitchen.
DIY drawer organizers offer a custom solution at a budget-friendly price, allowing you to design and build a system that perfectly fits your drawer dimensions and silverware collection. By opting for a homemade organizer, you avoid the compromise often necessary with pre-made organizers, which might not suit every drawer size or silverware quantity.
Moreover, engaging in such a DIY project can prove to be a fulfilling endeavor. It’s an opportunity to learn new skills or hone existing ones, such as woodworking and tool handling. Plus, this project can be a great weekend activity that results not only in improved kitchen functionality but also in the satisfaction of having crafted something useful and beautiful with your own hands.
In this blog post, we will guide you through everything from preparing your drawer for the makeover to adding the finishing touches to your custom organizer. Whether you are a seasoned DIY enthusiast or a beginner, these steps will help you create a perfectly organized silverware drawer that enhances your kitchen’s efficiency and aesthetics.
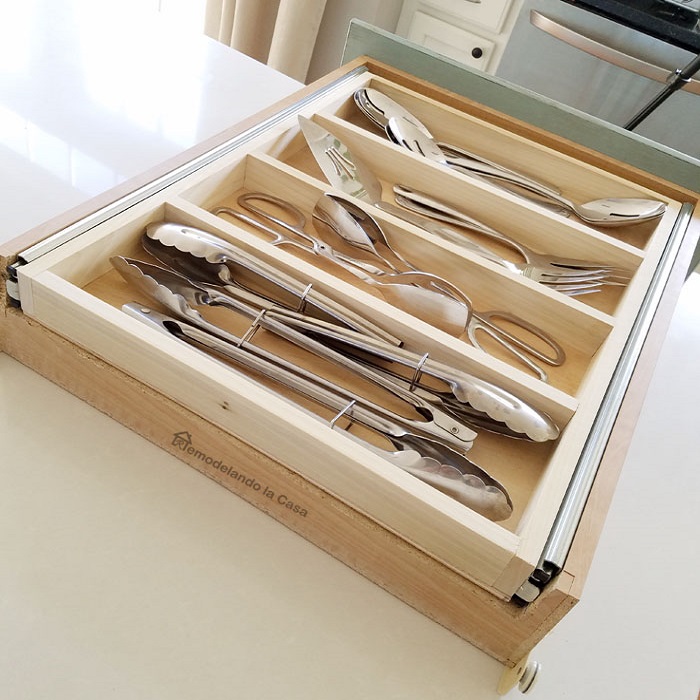
Preparing for Your Drawer Makeover
Before you dive into the creation of your diy silverware drawer organizer, proper preparation is crucial for a successful project. This phase involves assessing your drawer space, determining your silverware needs, and gathering the necessary materials.
Assessing Current Drawer Space and Needs
Start by emptying your drawer and giving it a good clean; it’s the perfect time to de-clutter. Sort through your silverware, considering what you use regularly and what can perhaps be stored elsewhere or donated. Measure the interior dimensions of your drawer, noting the width, depth, and height, so your organizer fits snugly without wasting space.
Consider how you’d like to categorize your silverware—as well as any additional utensils that may need a spot—and plan compartments accordingly. Think about ease of access for your most frequently used items; these should be the most accessible.
Gathering Materials
Once you’ve got your measurements and a sketch of your desired organizer layout, it’s time to gather your materials. You’ll need:
- Wood boards, preferably of a softwood like pine or poplar, that suit the dimensions of your drawer and compartments.
- A saw for cutting your wood to size. If you’re not comfortable with power tools, most hardware stores offer cutting services.
- Sandpaper to smooth out any rough edges once your wood is cut.
- Wood glue or screws, depending on whether you want a permanent solution or the flexibility to reconfigure your organizer in the future.
- Optional: wood stain or paint if you want to customize the look of your organizer.
- A measuring tape, a pencil for marking your wood, and possibly a square to ensure right angles.
With these steps completed, you’ll be ready to move on to measuring, cutting, and assembling your custom silverware organizer.
Step-by-Step Guide to Building Custom Organizers
Creating your own silverware drawer organizer is straightforward with the right approach. Follow this step-by-step guide to go from raw materials to a finished organizer that fits your drawer perfectly.
Measuring and Cutting Wood
Begin by measuring the inside dimensions of your drawer. Note the width, depth, and height carefully. With these numbers in hand, mark the wood boards for cutting. Remember, measurements must be precise for a snug fit.
Cut the wood according to the marks made for each divider. If you’re uncomfortable with cutting, a local hardware store can do it for you. Use sandpaper to smooth all edges once cut, ensuring no splinters or sharp edges remain.
Assembling and Securing Dividers
Now, assemble your dividers according to the design you planned. Place the wood pieces within the drawer to test the fit. Adjust as necessary.
Secure the dividers together using wood glue or screws. Screws offer more durability and allow reconfiguration if needed. Glue provides a cleaner look and can be easier for beginners.
Ensure each divider is tightly fastened before moving on. Check for stability; dividers should not wobble or shift.
With these simple steps, you’ll turn a cluttered drawer into an organized space in no time. The satisfaction of building a custom organizer is matched only by the convenience it will add to your kitchen routines.
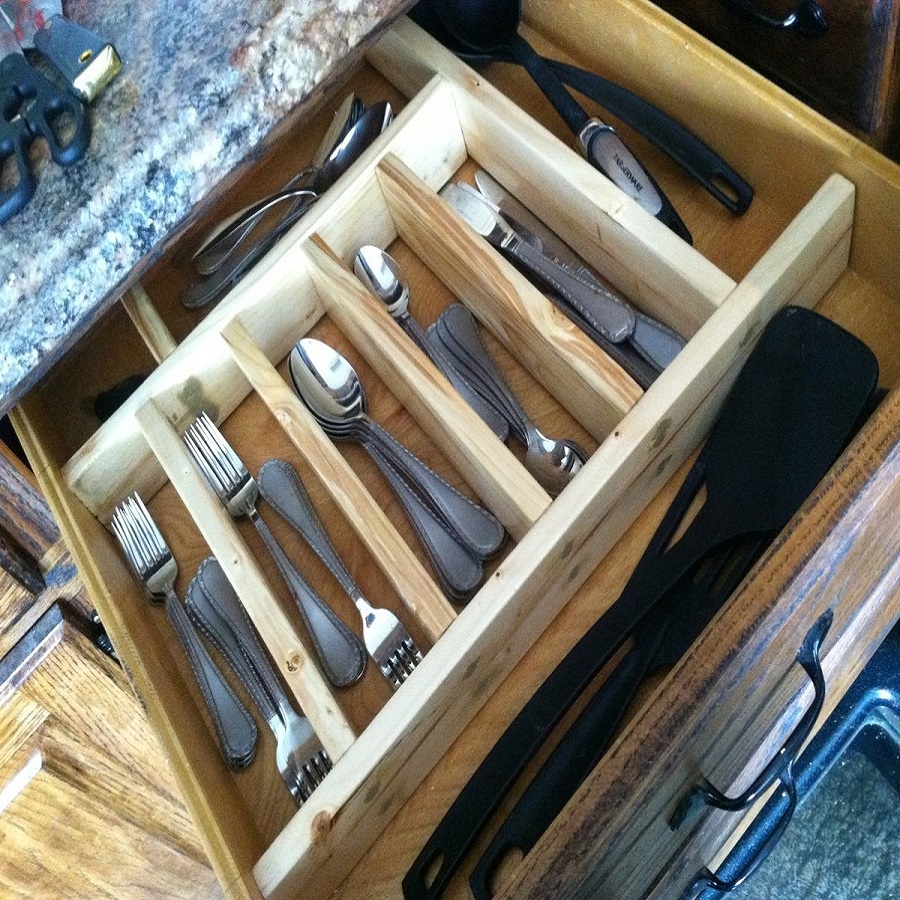
Essential Tools and Accessories
In tackling this DIY project, ensure you have the proper tools and materials.
Selecting the Right Wood and Tools
Choose softwoods, like pine or poplar, that are easy to cut and fit.
For cutting, a hand saw or miter saw will suffice, or inquire at your hardware store.
Sandpaper is a must for smoothing edges, guaranteeing a hand-friendly finish.
A measuring tape and pencil are essential for accurate cuts and assembly.
Screws vs. Glue for Assembly
Screws provide durability and adjustability if you plan to alter the organizer later.
Glue offers a seamless look but could prove less robust over time.
Consider your organizer’s longevity when choosing between screws and glue.
With attention to detail, an organizer built with care will last years.
Finishing Touches
After constructing your diy silverware drawer organizer, it’s time to add the final touches that will enhance both its appearance and functionality.
Staining and Sanding
To give your wood a polished and professional look, apply a stain or paint of your choice. Select a color that complements your kitchen decor. Use a brush or cloth to apply the stain evenly and wipe off any excess. Let it dry as per the stain’s instructions. Once dry, sand the surfaces lightly with fine-grit sandpaper. This step will help remove any imperfections and smooth the wood further, ensuring a refined finish.
Ensuring Durability and Fit
Ensuring your diy silverware drawer organizer is both durable and fits well is crucial. Check all the joints and the overall stability. If you opted for screws, ensure they are tightened properly, but be careful not to strip the wood. For glued joints, verify that there’s no excess glue and that the pieces are firmly bonded. Place the organizer into the drawer to confirm a snug fit. If it wobbles or shifts, make necessary adjustments until it sits securely within the drawer.
By taking these steps, you help ensure that your organizer not only looks great but also stands up to daily use, providing a practical and attractive addition to your kitchen.
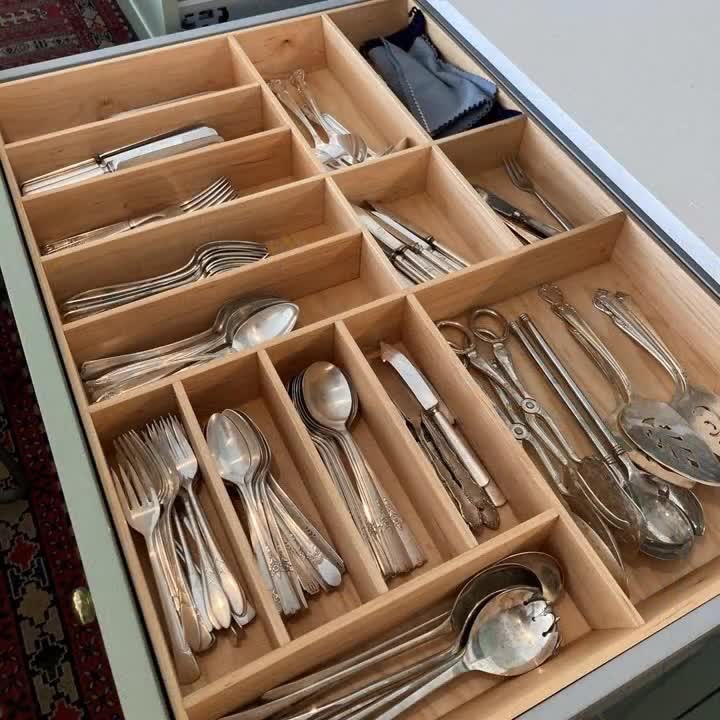
Cost Analysis: DIY vs. Store-Bought Organizers
When deciding between a DIY or store-bought silverware drawer organizer, cost is a significant factor to consider. Comparing the two options can help you choose the most economically sensible solution for your needs.
DIY Organizer Expenses
Material Costs: Purchasing wood, such as pine or poplar, sandpaper, screws or glue, might cost around $20 to $30 depending on the size and quality.
Tool Costs: If you don’t own tools such as saws or drills, you may either buy them or rent from local hardware stores. This could add $10 to $50 to your costs, if purchasing low to moderately priced tools.
Time Investment: Don’t forget to account for your time. While it feels rewarding to build something yourself, the hours spent could add up.
Total DIY Cost: Summing up all expenses, a DIY drawer organizer may range from $30 to $80.
Store-Bought Organizer Costs
Purchase Price: Ready-made organizers can range from $15 to $100, based on materials and brand.
Convenience: Unlike DIY, there’s no time investment for assembly. You pay for the product and use it immediately.
Variety and Fit: Many options are available, but they may not fit perfectly as a custom-built would.
Total Store-Bought Cost: You spend solely on the purchase price, which may or may not include additional fits or features.
In conclusion, DIY organizers offer a customizable and fulfilling project but can tally up in costs when factoring time and tools. Store-bought organizers bring convenience and immediate use but may come with a higher price tag or imperfect fits. Weigh your options based on these aspects to decide which suits your kitchen and budget best.
Maintenance and Care for Your DIY Drawer Organizer
Maintaining your DIY silverware drawer organizer is crucial for its longevity. Regular care ensures it continues to function well and look good. Here are some straightforward tips to keep your organizer in top shape.
Regular Cleaning
Start by emptying the drawer regularly for cleaning. Wipe down the organizer with a damp cloth to remove dust and crumbs. Avoid using harsh chemicals that might damage the wood.
Check for Loose Parts
Periodically check for any loose screws or weakened glue joints. Tighten screws as needed, or reapply glue to secure loose parts.
Treat Wood Annually
Consider treating the wood annually with a non-toxic sealant. This helps protect the wood from moisture and wear. It keeps the organizer looking fresh and new.
Handle with Care
When cleaning or rearranging, handle the organizer gently. Avoid dragging it across the drawer’s bottom to prevent scratches.
By following these simple maintenance steps, your DIY drawer organizer can serve you well for a long time. Regular care keeps it functional and beautiful in your kitchen.
