Introduction
Creating your very own kitchen drawer organizer can be a rewarding project that not only brings a sense of order to your utensils but also adds a custom touch to your kitchen space. As daunting as organizing drawers may seem, with the right materials, measurements, and a little DIY spirit, transforming your cluttered drawer into a neatly arranged storage space is absolutely achievable. This step-by-step guide will walk you through how to make a drawer organizer tailored precisely to your needs, ensuring every spatula, knife, and whisk has its designated spot. Plus, with a clever non-slip hack, you can ensure your newly crafted organizer stays firmly in place, providing functionality and ease every time you reach for your kitchen tools.
Materials Needed for DIY Drawer Organizer
To start your DIY journey towards an organized kitchen drawer, you’ll need the following materials:
Choosing the Right Wood
The foundation of your drawer organizer is the wood. Opt for a 3 or 4-foot piece of hobby board that matches the height of your drawer. Home Depot’s trim aisle typically stocks a variety of types like poplar or oak.
Measuring Tools
A reliable tape measure is essential for taking precise drawer dimensions. Measure the interior length, width, and height of your drawer for accurate cuts.
Cutting Tools
A miter saw or even a simple hand saw will suffice for cutting the hobby board to size. If precise cuts aren’t your forte, don’t worry—there’s a simple hack for a snug fit later on.
With these materials at hand, you’re equipped to create a custom drawer organizer that’s both aesthetically pleasing and highly functional.

Measuring Your Drawer for a Custom Fit
To ensure your DIY drawer organizer fits perfectly, accurate measurements of your drawer are essential. Start by measuring the interior width, depth, and height of your drawer. Use a tape measure for precision and note these dimensions carefully; they will guide the size of your dividers.
Taking Accurate Drawer Measurements
Pull the drawer out and measure the inside. For width, measure from one side of the drawer to the other. For depth, measure from the front to the back. Finally, for height, measure from the bottom of the drawer to the top. Ensure your tape measure is level and straight to get the most accurate measurements.
Planning Divider Layout
Decide how you want to organize your utensils or other kitchen tools. Plan where each divider will go, considering the size and shape of the items that will be stored. Sketch a simple diagram of your drawer with the dividers placed. This visual guide will help as you move on to cutting and assembling the dividers.
Cutting the Drawer Divider Pieces
To accurately cut the drawer divider pieces, follow these step-by-step instructions. This process will ensure your drawer dividers fit perfectly and provide a structured organizing system.
Step-by-Step Cutting Instructions
- Begin by marking the hobby board with the measurements you took earlier. Use a pencil for clear, temporary markings.
- Secure the wood on your work surface to prevent it from moving. You might use clamps or a sturdy vise.
- Use a hand saw or miter saw to cut the wood along the marked lines. If using a hand saw, ensure steady, controlled strokes for cleaner cuts.
- Double-check the dimensions of each cut piece by placing it inside the drawer. This ensures each piece fits perfectly before assembly.
Tips for Precise Cuts
- Keep the saw blade sharp to avoid jagged edges.
- Measure twice before cutting to minimize mistakes.
- If necessary, use a file or sandpaper to smooth out any rough edges.
Properly cut drawer dividers are crucial for a snug fit and effective organization. With precise cuts, your dividers will both look good and function well.
Assembling the Drawer Organizer
Positioning the Dividers
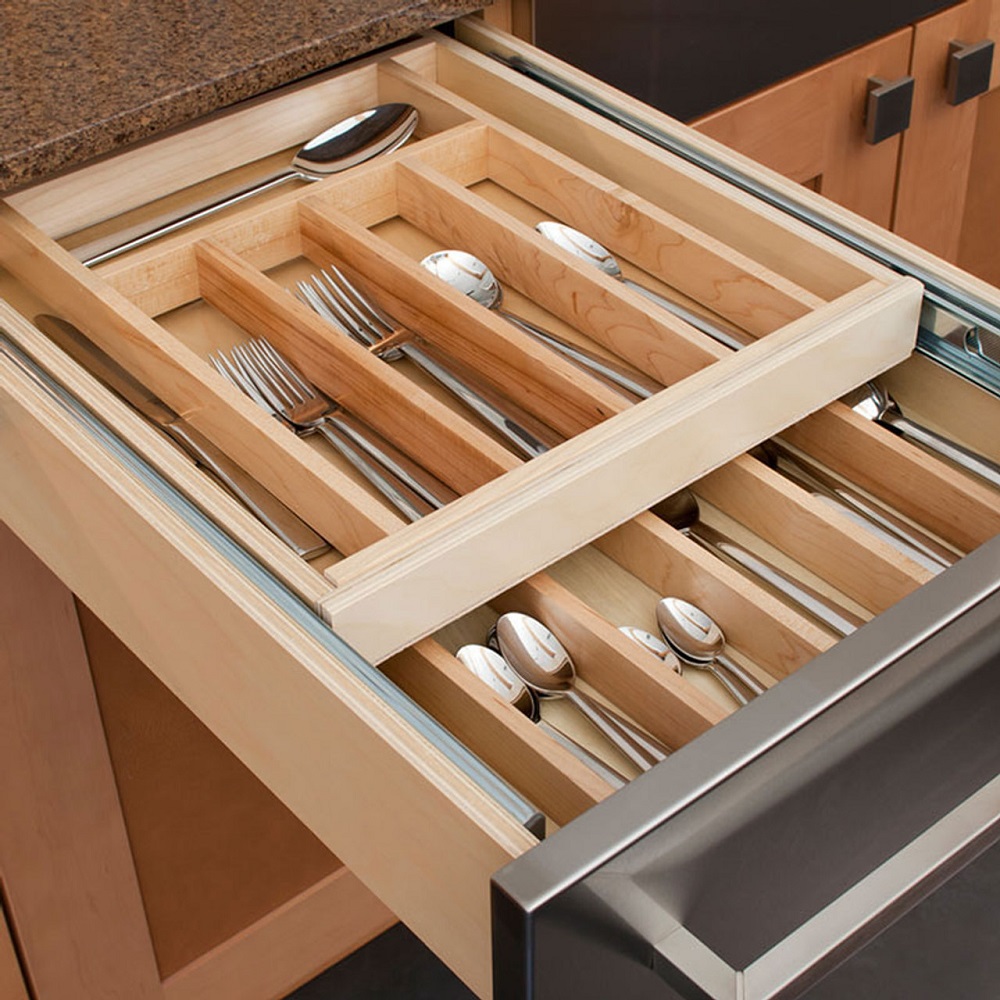
To assemble your drawer organizer, start by positioning the dividers according to your previously planned layout. Place each wooden divider inside the drawer at the designated spots. Adjust the positions as needed to ensure a good fit and balanced compartment sizes.
Securing Dividers Without Nails or Glue
For a secure fit without the permanency of nails or glue, use tension and precise measurements. If the dividers fit too loosely, employ a non-slip hack, such as wrapping the ends with rubber bands or adding felt pads, which will be discussed in more detail in the following sections.
This method allows for easy removal or rearrangement of dividers, catering to future changes in storage needs or cleaning processes.
The Secret to a Non-Slip Organizer
Transforming a chaotic drawer into a structured storage space is not just about inserting dividers. The true challenge is making sure those dividers stay put without slipping every time the drawer opens or closes. The secret? Cabinet door bumpers! These small but mighty accessories can be applied to the ends of your drawer dividers to provide enough grip to keep everything firmly in place. This simple solution does not require any adhesive or permanent fixtures, making it perfect for renters or those who like to switch things up.
Using Cabinet Door Bumpers
Cabinet door bumpers are typically used to cushion the impact of cabinet doors, but they’re also perfect for securing DIY drawer dividers. By attaching these bumpers to the ends of each divider, you can fill in any small gaps and create tension to hold the divider snugly against the drawer walls. Plus, because they’re made of rubber or silicone, they grip the drawer sides without leaving marks or residue. Best of all, they’re inexpensive and readily available at any hardware store.
Simply clean the ends of your dividers, peel the adhesive backing off the bumpers, and stick them where needed. You can add bumpers to one or both ends of a divider, depending on the fit. The trick is to place bumpers strategically so they create tension without making it difficult to insert or remove the divider. With this hack, your drawer organizer can withstand daily use while keeping your utensils neatly in place.
Final Adjustments and Installation
Once you have affixed cabinet door bumpers to your drawer dividers, it’s time to make final adjustments before installation. Test each divider within the drawer, ensuring they are secure and do not slide when the drawer opens and closes. If any dividers sit too loosely, add an extra bumper or two until the tension is just right, providing a snug, non-slip fit.
Ensuring a Snug Fit
For dividers that still need fine-tuning, you may add thin strips of felt, foam tape, or additional bumpers to create a tighter fit. This attention to detail will prevent dividers from shifting and will keep your utensils in place. Adjust each divider until it fits comfortably and firmly in the drawer without any wobbling.
Adding and Testing the Organizer
With all pieces cut and secured with bumpers, carefully place your DIY drawer organizer into the drawer. Once installed, gently open and close the drawer to test the stability of the dividers. Make any necessary last-minute adjustments to ensure the organizer operates smoothly. Congratulations, you now have a custom-made, non-slip kitchen drawer organizer that will make finding your utensils a breeze.
Additional Tips for Drawer Organization
When you’ve created your personalized drawer organizer, the next step is keeping that neat order over time. Here are some additional tips to help maintain your newly organized drawer and ensure its long-term utility.
Best Practices for Decluttering
Start by sorting through all your utensils and gadgets, removing items you no longer use or need. Be ruthless – if something doesn’t serve a purpose, it’s just taking up valuable space. You can donate or discard these items responsibly. After your initial declutter, schedule regular clean-outs every few months to keep clutter at bay.
Maintaining Your Newly Organized Drawer
To preserve the organization of your drawer, develop good storage habits. Place items back in their designated compartments immediately after washing. When you purchase new kitchen tools, consider where they will go in the drawer before you buy them to avoid overcrowding. A ‘one in, one out’ rule can prevent your drawer from becoming cluttered again.
Conclusion
Creating a DIY kitchen drawer organizer not only provides a home for every utensil but also encourages a clutter-free environment. Embrace customization and take pride in your DIY efforts. Use your creativity to adapt and alter this project to suit other areas that might need tidying. With your handcrafted organizer and these maintenance tips, you’re on your way to a more efficient and enjoyable kitchen workspace.
Conclusion
Creating a custom DIY kitchen drawer organizer not only efficiently houses each utensil but also fosters an orderly environment. By taking the time to measure, cut, and assemble with care, you gain a personalized drawer solution tailored to your kitchen’s needs. This project showcases the value of DIY customization, proving that with a little effort and creativity, you can transform a chaotic space into a model of organization. By maintaining your organizer and adhering to decluttering practices, you ensure the longevity and functionality of your newly streamlined kitchen drawer. Reflect on your handiwork with pride and embrace the continuous journey of home improvement and organization.
