Introduction
Welcome to this step-by-step guide on building a DIY knife drawer organizer. If you’ve been struggling with cluttered kitchen countertops or jam-packed drawers, this project is the fix you need. A knife drawer organizer not only tidies up your space but also ensures your kitchen knives are neatly stored away, handy, and safe from damage. With this do-it-yourself approach, you’ll customize a solution that fits perfectly into your kitchen drawer, tailored to the specific sizes and types of knives you own.
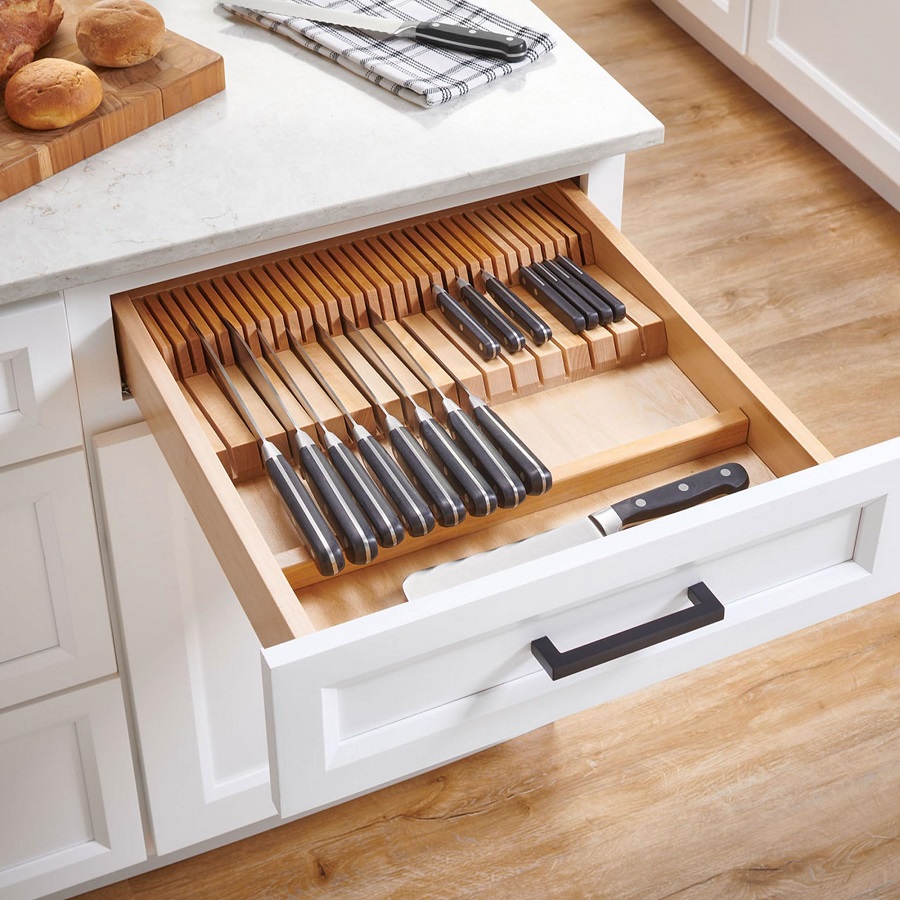
In crafting your own knife drawer organizer, you’ll gain the flexibility to include features that address your culinary demands, like varying slot sizes or integrated cutting board storage. This guide is designed to walk you through the creation of a durable and functional organizer, from selecting the appropriate materials, to the necessary woodworking tools, and final touches of maintenance advice. We will also touch upon customization ideas to accommodate different kinds of knives and how to couple the organizer with cutting board storage for maximum efficiency. Let’s embark on this journey to a better-organized kitchen!
Benefits of a Knife Drawer Organizer
Investing time and effort into creating a DIY knife drawer organizer brings with it several benefits worth considering. Here we’ll discuss the main perks provided by a personalized knife storage solution.
- Safety First: A dedicated organizer keeps sharp knives out of reach for children and neatly tucked away, reducing the risk of accidental cuts. Without loose knives in the drawer, it’s safer to reach in for utensils.
- Clear Countertops: By moving knives from a block on the counter to a drawer, you free up valuable counter space. This decluttering can make your kitchen look neater and more inviting.
- Knife Longevity: Storing knives in a designated spot protects the blades from damage. Without the jostling and contact with other utensils that occurs in a crowded drawer, your knives will stay sharper for longer.
- Organized Cooking Experience: An organized drawer improves your cooking flow, allowing you to quickly find the knife you need without sorting through a pile of cutlery.
- Customization to Your Needs: Designing your own organizer means you can create space for exactly your knife collection, fitting various lengths and widths, ensuring a snug and secure fit for each piece.
- Aesthetic Appeal: A DIY knife drawer can be tailored to your kitchen’s style, with choices in wood finish and design. This attention to detail contributes to a cohesive look in your culinary space.
When you understand the advantages of a custom knife drawer organizer, you can appreciate the value it adds to your kitchen beyond just the organizational aspect. It’s a practical improvement that elevates safety, aesthetics, and cooking efficiency.
Choosing the Right Materials
Selecting the right materials is crucial for creating a durable and functional DIY knife drawer organizer. To ensure you choose wisely, consider the following factors:
- Type of Wood: Opt for hardwoods such as maple, oak, or walnut for their durability and resistance to wear. Softwoods like pine are more prone to dents and may not hold up as well to the weight and friction of knives.
- Wood Finish: Seek a food-safe finish, like mineral oil or a specialized cutting board wax, to protect the wood and keep it looking sharp. This also makes it easier to clean and maintain.
- Dowel Rods: Use sturdy dowel rods for dividers, matching the type of wood to the main structure for consistency. Ensure they’re sized appropriately for the knives you intend to store.
- Adhesives: Choose a high-quality, food-grade wood glue. It should be strong enough to keep the organizer intact, but safe for use with utensils that will contact food.
- Fasteners: If required, use brackets or small nails that fit comfortably within the structure without protruding. These will help reinforce the organizer without being visible.
Remember, the quality of your materials will determine the longevity and effectiveness of your knife drawer organizer. Investing in better materials up front will pay off in the long-term durability of your DIY project.
Essential Tools for the Project
To embark on your DIY knife drawer organizer, certain tools are essential. These tools ensure precise cuts, sturdy assembly, and a professional finish to your custom organizer:
- Measuring Tape: Accuracy is key when measuring spaces for your knives.
- Saw: A saw is needed to cut the wood to the correct dimensions. Choose between a hand saw or power saw based on your comfort and the tools you have.
- Drill: For making pilot holes, a drill comes in handy, especially if you are attaching parts with screws or nails.
- Sandpaper or Sander: To smooth out all surfaces and edges, use sandpaper or an electric sander.
- Clamps: These are useful to hold pieces together while the glue dries, ensuring a tight bond.
- Wood Glue: A strong, food-grade wood glue will keep the organizer together.
- Hammer or Nail Gun: If using nails or brads, a hammer or nail gun might be required to fasten parts together.
- Square: A carpenter’s square ensures the organizer’s corners are perfectly right-angled.
- Safety Equipment: Safety glasses and gloves protect you from potential harm while working.
Having the right tools not only makes the project easier but also ensures you get results that are functional, elegant, and durable. Remember, always prioritize safety when using these tools, and approach each step with precision and care. With your toolkit ready, you’re all set to proceed to the next phase: building your custom knife drawer organizer.

Step-by-Step Construction Process
To craft your DIY knife drawer organizer, follow these detailed steps for a smooth construction process:
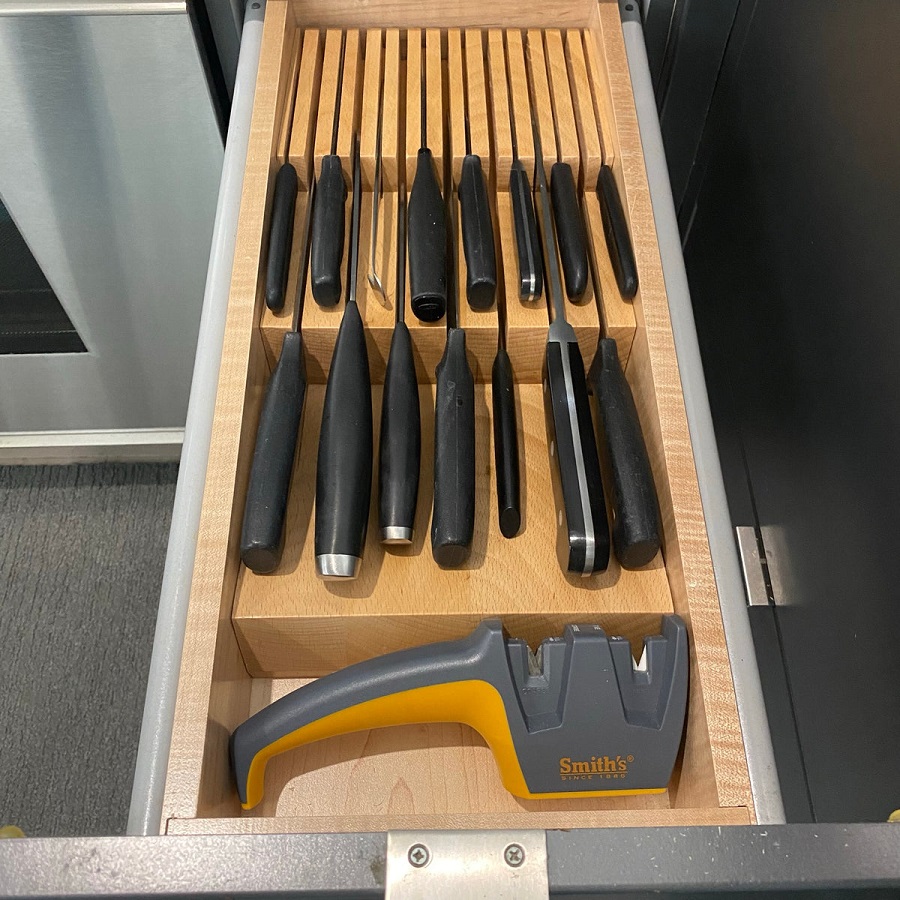
- Measurement and Cutting: First, measure the interior dimensions of your kitchen drawer. Then, cut your selected wood planks and dowel rods to the necessary lengths, ensuring precision for a snug fit.
- Arranging the Layout: Lay out the cut planks on a flat surface, arranging them in the configuration of your drawer. This helps visualize how the organizer will look and function.
- Scissor Slot Creation: If including a slot for scissors, decide on the number of slots needed and place dowels accordingly. Make sure they’re spaced correctly and glued securely.
- Glue and Clamp: Apply a light coat of food-grade wood glue to the dowel rods and attach them to the base plank. Use clamps to hold them together and allow sufficient drying time.
- Adding the Knife Slots: Depending on your knife collection, place the 1/4″ dowels to create slots for each knife. For larger knives, center a dowel; for smaller ones, adjust spacing to accommodate three or more in a section.
- Final Assembly: Once the glue has set, stack the planks with glued dowels and add additional layers as needed for height. Use enough planks to create a solid structure.
- Trim and Square: After the knife block dries, trim any uneven edges. Use a saw to square up the ends, ensuring a clean, flush fit in the drawer.
By following these steps carefully, you’ll build a sturdy,custom-fit DIY knife drawer organizer that enhances your kitchen’s functionality and aesthetics.
Finishing and Maintenance Tips
Once you have assembled your DIY knife drawer organizer, the final steps involve applying finish and understanding its maintenance. Here’s how to keep your organizer in top condition.
Applying Finish
- Choose a Food-Safe Option: Ensure the finish like mineral oil is food-safe for kitchen use.
- Even Application: Use a clean cloth to apply the finish evenly over the wood.
- Multiple Coats: It’s often best to apply several thin coats, allowing time to dry between them.
Routine Maintenance
- Regular Clean-Up: Wipe down the organizer to remove crumbs and debris.
- Avoid Water Damage: Dry knives before storing to prevent water from soaking into the wood.
- Reapply Finish: Every few months, reapply the finish to keep the wood protected.
- Check for Wear: Inspect your organizer for any wear or damage periodically and make repairs.
These tips will help lengthen the life of your DIY knife drawer organizer and maintain its functionality and appearance. By caring for your organizer properly, you ensure it remains a valuable addition to your kitchen for years to come.
Customization Ideas for Different Knife Types
When personalizing your DIY knife drawer organizer, think about the different knives you have. Tailoring the organizer to fit various types of knives will improve usability and ensure a custom, efficient storage solution. Here are some ideas to customize your organizer:
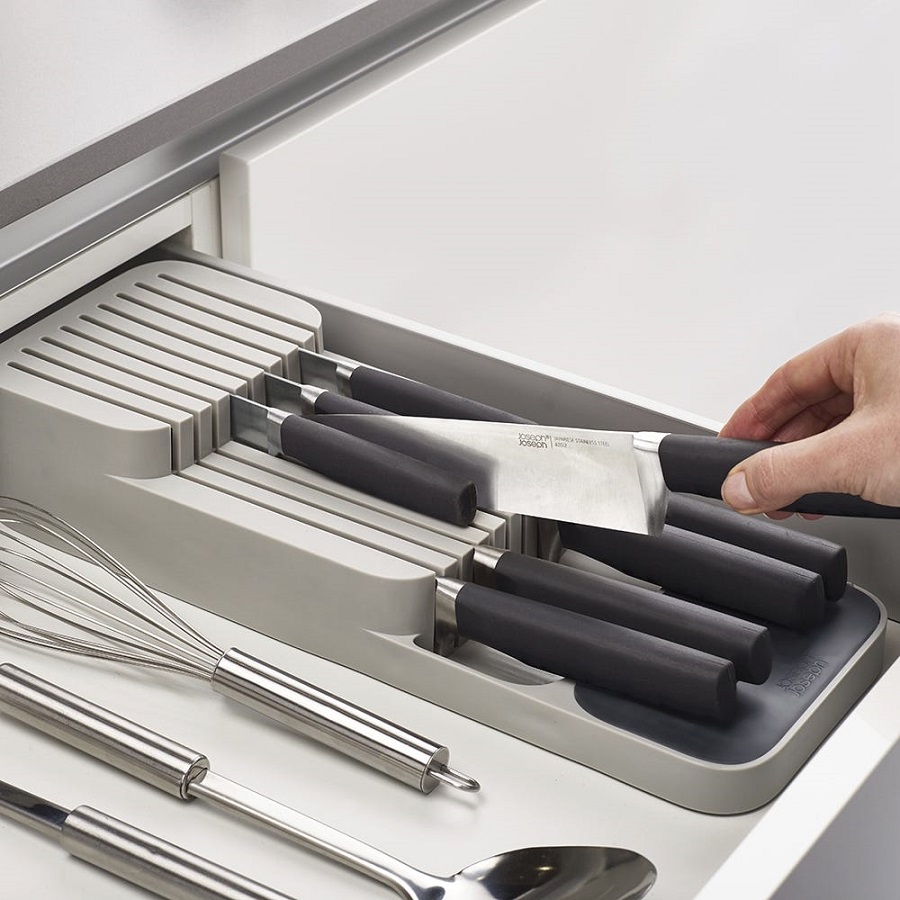
- Steak Knives: These typically require smaller slots. Space dowels closer to create narrow sections that can snugly fit steak knives without them moving around.
- Chef Knives: Chef knives need wider slots due to their size. Ensure that each chef knife has its own slot and enough space to be easily inserted and removed.
- Paring Knives: These small knives can be stored in groups. Design a section with multiple close-together slots that allow you to store several paring knives side by side.
- Bread Knives: With their serrated edges, bread knives might need individual slots. Make them slightly wider to accommodate the serration without damage.
- Carving and Slicing Knives: Long and narrow, these knives may require deeper slots. Adjust your organizer’s height or add extra layers of wood accordingly.
- Cleavers: Cleavers are broader and need ample space. Dedicate an open section of the organizer for this type of knife to ensure a good fit.
- Scissors and Specialty Tools: Consider adding areas with flexible storage for scissors, honing rods, or other kitchen tools. You might use adjustable dividers for this purpose.
- Slot Markings: Marking the slots with the type of knife they hold can be a handy reminder. Use subtle engravings or small labels to indicate where each knife should go.
Each knife type has its own specifics, and your DIY organizer should reflect that. Think about how you use your knives and what layout will serve you best. This way, the organizer will be perfectly suited to your needs, making cooking more enjoyable and efficient.
How to Incorporate Cutting Board Storage
Creating a combined knife drawer organizer and cutting board storage can be a smart way to save space and keep your kitchen tools orderly. Here’s a step-by-step approach to integrating cutting board storage into your DIY knife drawer organizer:
- Measure the Space: Determine how much of the drawer will be dedicated to knives and how much for cutting boards.
- Design the Sections: Plan a layout that includes space for cutting boards adjacent to where the knives will be stored.
- Select Suitable Materials: Just like with the knife slots, choose durable wood and food-safe finishes for the area where you’ll store the cutting boards.
- Build the Cutting Board Holder: Construct a separate section or a division within the drawer using wood planks. Align them to create a slot or compartment for cutting boards.
- Attach the Holder: Secure the cutting board storage section to the drawer or to the knife organizer, depending on your drawer’s dimensions and your personal preference.
- Ensure Easy Access: Design the storage so that the largest cutting board can be easily removed and replaced.
- Finishing Touches: Sand all parts smoothly and apply a food-safe finish to the cutting board storage area.
By incorporating cutting board storage, you optimize drawer space and have a more structured kitchen setup, where each tool has its place.
Final Thoughts and Project Recap
After closely following this step-by-step guide, you should now have a functional and custom DIY knife drawer organizer. By embarking on this project, you have enhanced your kitchen’s organization and efficiency. This tailored storage solution not only provides a safer way to store knives but also declutters your countertop space, allowing for a more enjoyable cooking experience.
This guide outlined the importance of selecting the right materials and tools, ensuring your DIY project stands the test of time. We walked through each phase of construction—from planning to execution—and offered maintenance tips to preserve your organizer’s condition. Additionally, the customization ideas presented enable you to adapt your organizer to suit any type of knife collection.
Moreover, incorporating cutting board storage into the organizer design was suggested to optimize kitchen space fully. By integrating such features, you’ve possibly avoided additional purchases of standalone storage units, saving money and maintaining a cohesive look in your kitchen.
With proper upkeep, including regular cleaning and occasional reapplication of a food-safe finish, your knife drawer organizer should serve you well into the future. Remember, the beauty of a DIY project lies in its flexibility; it can always be updated or modified as your needs evolve. May this addition to your kitchen inspire more creative culinary endeavors and bring a sense of accomplishment every time you reach for a knife.