Introduction to Drawer Organization
The Importance of a Well-Organized Drawer
In today’s fast-paced world, maintaining an organized living space can significantly enhance your productivity and peace of mind. A cluttered drawer can lead to frustration, wasted time, and even stress. By investing a little time into creating a DIY wood drawer organizer, you can transform a chaotic drawer into a well-structured space that makes finding items a breeze. This project is not only practical but also an opportunity to exercise creativity and craftsmanship.
Benefits of a DIY Approach
Choosing a DIY approach for your drawer organizer allows for customization to fit your specific needs. Unlike store-bought organizers, which may not perfectly suit your drawer dimensions or personal style, a DIY project empowers you to create something uniquely yours. You can select the materials, design, and layout that best fit your storage requirements, making the finished product not just functional but also aesthetically pleasing.
Gathering Materials for Your Organizer
Essential Tools and Supplies
Before diving into the project, it’s crucial to gather all necessary tools and materials. For a basic wooden drawer organizer, you will need the following: plywood or hardwood boards (depending on your preference), wood glue, screws, sandpaper, a saw (circular or miter saw), a drill, and a measuring tape. Additionally, you may want wood stain or paint if you desire a finished look. Having everything on hand will streamline the process and help you avoid interruptions.
Choosing the Right Wood
When selecting wood for your organizer, consider both durability and aesthetics. Plywood is an economical choice and works well for hidden compartments, while hardwoods like oak or maple offer a more refined look. If you plan to stain or paint the organizer, choose wood that takes finishes well. Inspect the wood for defects, such as knots or warping, to ensure your finished project looks great and stands the test of time.
Designing Your Organizer
Measuring Your Drawer
Once you have your materials, the next step is measuring your drawer. This is a critical phase; precise measurements ensure that your organizer fits snugly within the drawer. Use a measuring tape to measure the width, depth, and height of the drawer, noting any variations that might affect the design. It’s wise to take multiple measurements to double-check accuracy.
Sketching the Layout
After measuring, sketch a layout for your organizer. Consider what items you plan to store, such as utensils, office supplies, or craft materials. Visualize how many compartments you need and their dimensions. This will help you create a practical design that accommodates everything you want to store while maximizing the available space. Don’t hesitate to experiment with different designs on paper before settling on a final version.
Cutting and Preparing the Wood
Preparing the Wood Pieces
Once your design is finalized, it’s time to cut the wood pieces. Carefully mark the dimensions on your wood using a pencil and ruler, ensuring that your cuts will be straight. When using a saw, always prioritize safety by wearing protective gear like goggles and gloves. Take your time with each cut to ensure precision, as this will affect the overall appearance and functionality of your organizer.
Sanding for Smoothness
After cutting, it’s essential to sand the edges and surfaces of your wood pieces. Sanding helps eliminate any splinters and rough spots, making the organizer safe to handle and visually appealing. Start with coarse sandpaper (around 80 grit) and gradually move to finer grit (up to 220 grit) for a smooth finish. Pay particular attention to corners and edges to ensure they are rounded and safe, especially if you have children or pets at home.
Assembling the Organizer
Dry Fitting the Pieces
Before permanently assembling the pieces, conduct a dry fit. This involves placing all the cut pieces together without any glue or screws to ensure they fit as planned. Adjust any pieces if necessary; this step can save time and effort later. Take note of how the pieces align and if any adjustments are needed for a perfect fit. This process is crucial to achieving a polished final product.
Gluing and Screwing the Pieces
Once you’re satisfied with the dry fit, it’s time to start assembling. Apply wood glue to the edges of the joints and press the pieces together firmly. For added strength, use screws to secure the joints. Drill pilot holes to prevent the wood from splitting and ensure a clean finish. It’s advisable to clamp the pieces together while the glue dries, as this will create a tight bond and prevent any movement.
Finishing Touches
Staining or Painting the Organizer
After the glue has dried and your organizer is securely assembled, consider applying a finish. Staining the wood can enhance its natural beauty and provide protection, while paint allows for personalization. Choose colors that complement your space or reflect your style. Apply the finish in a well-ventilated area and follow the manufacturer’s instructions for the best results.
Adding Lining or Dividers
To further customize your organizer, you can add lining to the compartments. Felt or fabric can protect delicate items and add a touch of elegance. Additionally, consider incorporating dividers within larger compartments to keep smaller items organized. You can use additional strips of wood for this purpose, adjusting the layout based on your needs.
Organizing Your Drawer
Sorting Items for Storage
Now that your DIY wood drawer organizer is complete, it’s time to sort through the items you plan to store. Gather all items you want to keep in the drawer and categorize them based on size, frequency of use, and type. This step helps you make the most of your new organizer and ensures that everything has a designated spot.
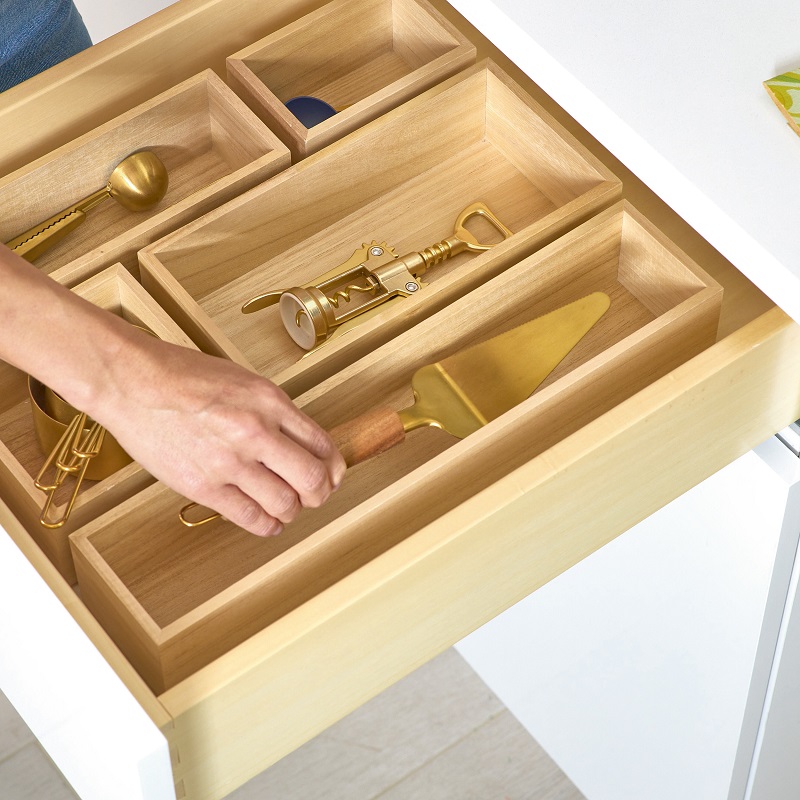
Placing Items in the Organizer
Carefully place your sorted items into the compartments of your organizer. Start with the larger items and work your way down to the smaller ones, ensuring that everything fits comfortably without overcrowding. It’s beneficial to keep frequently used items toward the front or top for easy access. This organizational strategy will help maintain order and efficiency every time you open the drawer.
Maintaining Your Organizer
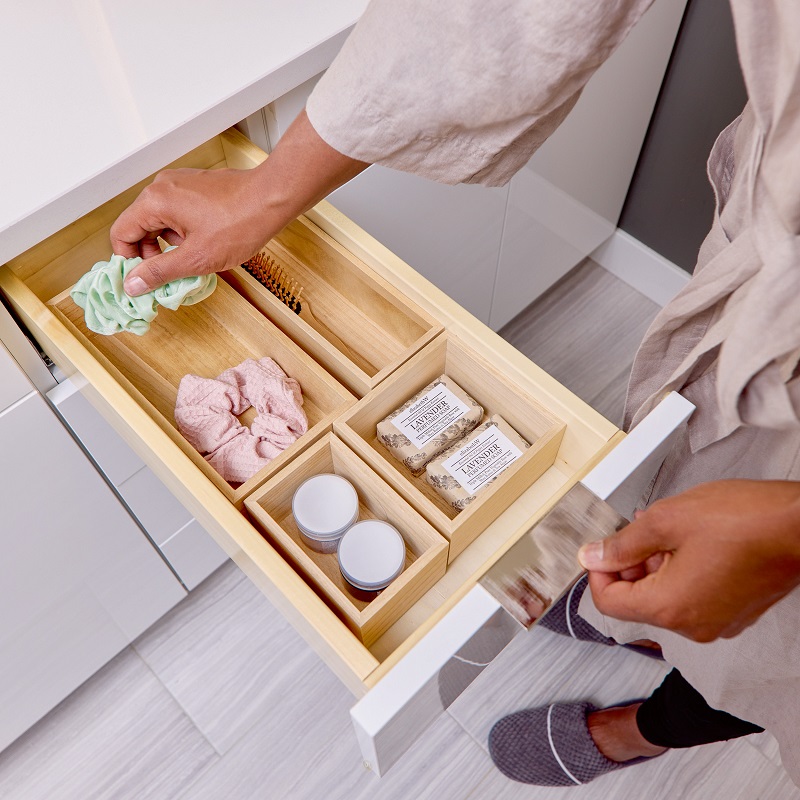
Regular Cleaning and Upkeep
To ensure that your drawer organizer remains in great condition, it’s important to commit to regular maintenance. Every few months, take a moment to clean the organizer by removing items and wiping down surfaces with a damp cloth. This simple act will help prevent dust buildup and keep your organizer looking fresh and new.
Reevaluating and Reorganizing
As time goes on, your storage needs may change. Regularly reassess the contents of your drawer and adjust the organization as necessary. If you acquire new items or find that certain compartments are no longer serving their purpose, don’t hesitate to modify your layout. The beauty of a DIY wood drawer organizer is that it can evolve with you, providing lasting utility in your home.
Exploring Advanced Customizations
Adding Unique Features
If you’re feeling ambitious, consider adding unique features to your organizer. This could include built-in trays for specific items, magnetic strips for holding tools, or even a small sliding drawer for hidden storage. These customizations not only enhance functionality but also add a personal touch to your project.
Experimenting with Different Designs
Once you’re comfortable with the basic design, experiment with various layouts and styles. Try creating organizers for different drawers around your home, such as kitchen utensils, office supplies, or crafting tools. Each project can teach you new techniques and allow you to refine your skills, making every new organizer a fresh and exciting challenge.
Conclusion: The Satisfaction of DIY Organization
Reflecting on Your Accomplishment
Completing a DIY wood drawer organizer is a rewarding experience that brings both functionality and beauty to your living space. You’ve transformed a cluttered drawer into an organized haven, which not only saves time but also creates a sense of calm. Each time you open the drawer, you’ll feel a sense of accomplishment, knowing you created it yourself.
Encouragement for Future Projects
This project serves as a stepping stone to more complex DIY endeavors. With newfound skills and confidence, consider tackling additional home organization projects or even larger woodworking endeavors. The possibilities are endless, and each completed project enhances your living space while nurturing your creativity. Embrace the journey of DIY, and enjoy the satisfaction that comes from crafting functional, beautiful pieces for your home.