A messy sock drawer is a common problem in many households. Socks often get bunched up, mislaid, or completely lost within the dark depths of a drawer where they may never see the light of day again. This chaos not only leads to frustration when you’re in a hurry, but it can also create time-consuming searches for matching pairs. If you’ve found yourself wanting to transform your messy sock drawer into a well-organized oasis, you’re in the right place! This comprehensive guide will take you through the steps necessary for creating your very own DIY sock organizer, ensuring that your socks have a neat home where they belong.
Step 1: Clear Out the Drawer
Before diving into the world of organization, the first step is to clear out your messy sock drawer entirely. Remove every sock, no matter how mismatched or old, and lay them out on a flat surface. This allows you to see the current state of your sock collection and gives you a chance to assess the items that need to stay and those that should go. Through this process, it’s helpful to categorize your socks. You can distinguish between everyday pairs, special occasion socks, winter warmers, or even sports socks.
After sorting them, make a list of the categories you have, which will serve as your blueprint when creating your DIY organizer. Also, take note of how many socks belong to each category; this will help you gauge how much space you’ll need and what type of storage solutions will be effective moving forward. Once you’ve sorted and counted, it’s time for the all-important next step: deciding what to keep. If you have socks that are worn out, don’t fit, or have lost their partners, consider donating them (if they’re in good condition) or tossing them in the trash if they’re beyond salvage.
Step 2: Select the Right Organizer Style
Now that you’ve cleared out your sock drawer and have a better understanding of your collection, it’s time to decide on the organizer style that suits you best. There are countless ways to organize socks, and the one you choose depends mainly on your preferences, the types of socks you own, and the space available in your drawer.
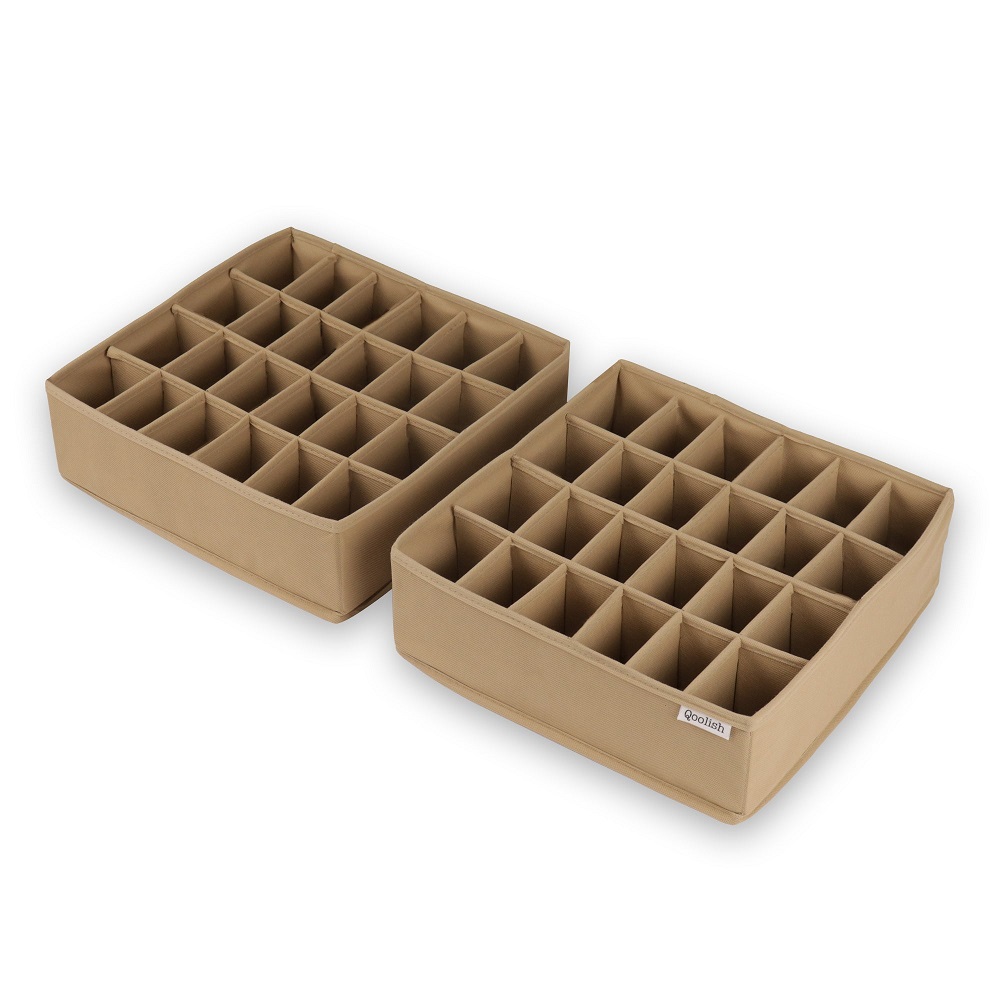
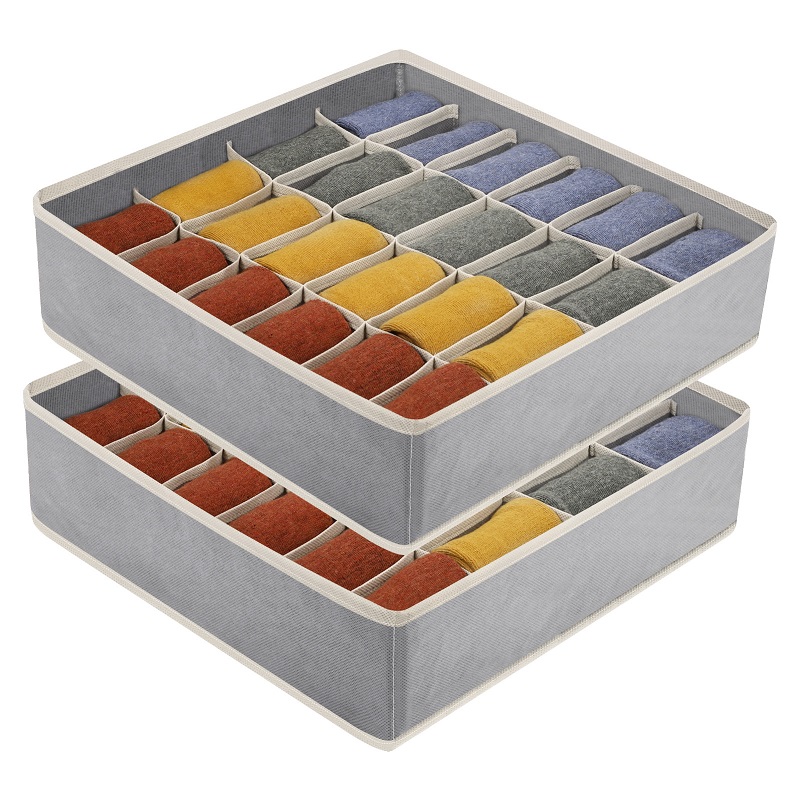
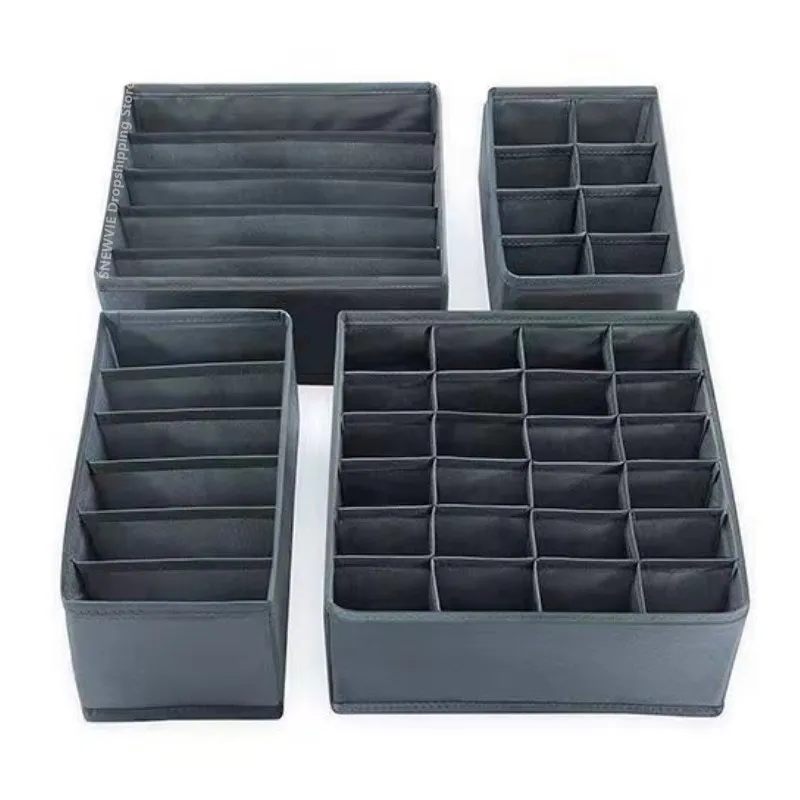
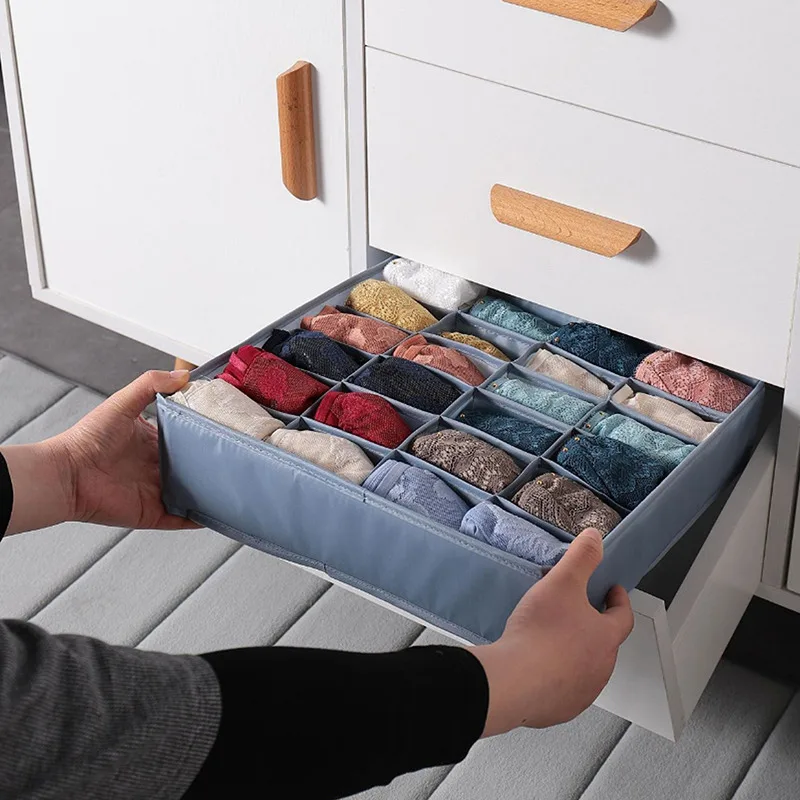
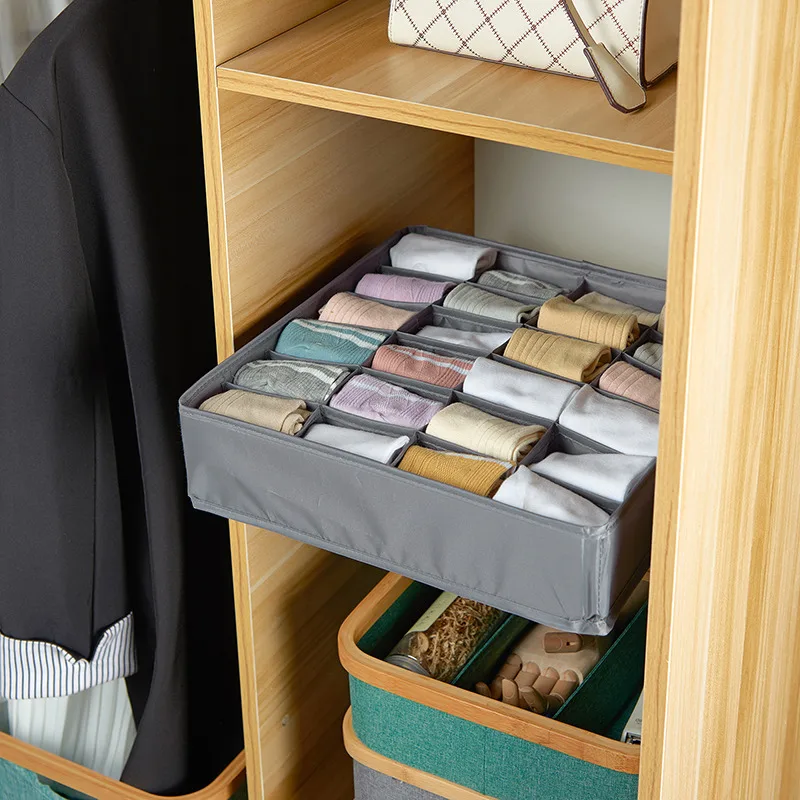
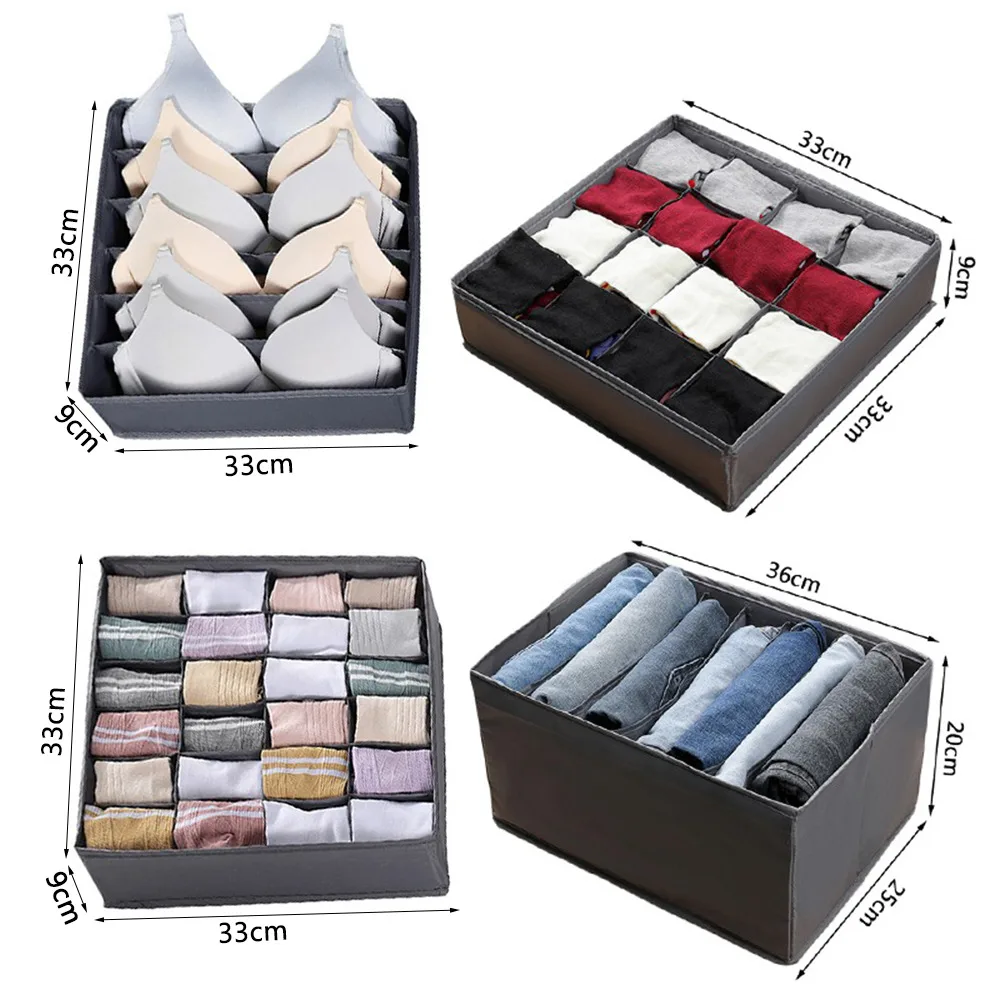
Consider investing in compartmentalized organizers, which can typically be made from materials like fabric, plastic, or wood. These organizers can fit into various sizes of drawers and can be customized based on the number of compartments you need. If you’re a DIY enthusiast, you could also create your own organizer. For example, you could use cardboard to make dividers that fit snugly within your drawer, effectively creating individual sections for each category of socks. This will also allow you to design the organizer to suit your specific needs, from housing thick winter socks to delicate dress socks.
Another available option is vertical storage. Some drawers might be better off with a vertical arrangement that allows you to see all your socks at once. This could mean rolling your socks and placing them in a small basket or mood box where they are easily accessible yet organized. Each of these methods has its pros and cons, so weigh your options carefully before you start working on your DIY organizer.
Step 3: Design and Build Your DIY Organizer
Once you’ve chosen the style for your sock organizer, the next step is to design and build it. This section will require some creativity and a willingness to experiment. If you’re using cardboard, look for boxes that are sturdy enough to resist bending or collapsing over time. Cut the cardboard into small strips for the dividers, ensuring they are high enough to keep your socks upright. Use tape or glue to secure the dividers in place within the drawer.
If you’re opting for fabric organizers, measure the dimensions of your drawer and cut the fabric accordingly. You can sew simple compartments or use fabric glue to secure sections. Both methods yield a beautiful, layered look. For those who prefer a minimalistic approach, consider wooden dividers that can stain or painted to match your decor. By using wood, you’ll add a touch of elegance to your sock drawer, while the sturdiness of the material ensures long-term durability.
Regardless of what material you decide to work with, make sure the dimensions of your organizer fit well within your drawer’s space. After constructing your organizer, take the time to test it out by placing it in the drawer. Ensure your design is not just functional but also visually appealing; after all, the goal is to transform your messy sock drawer into a tidy and aesthetically pleasing space.
Step 4: Sort and Arrange Your Socks
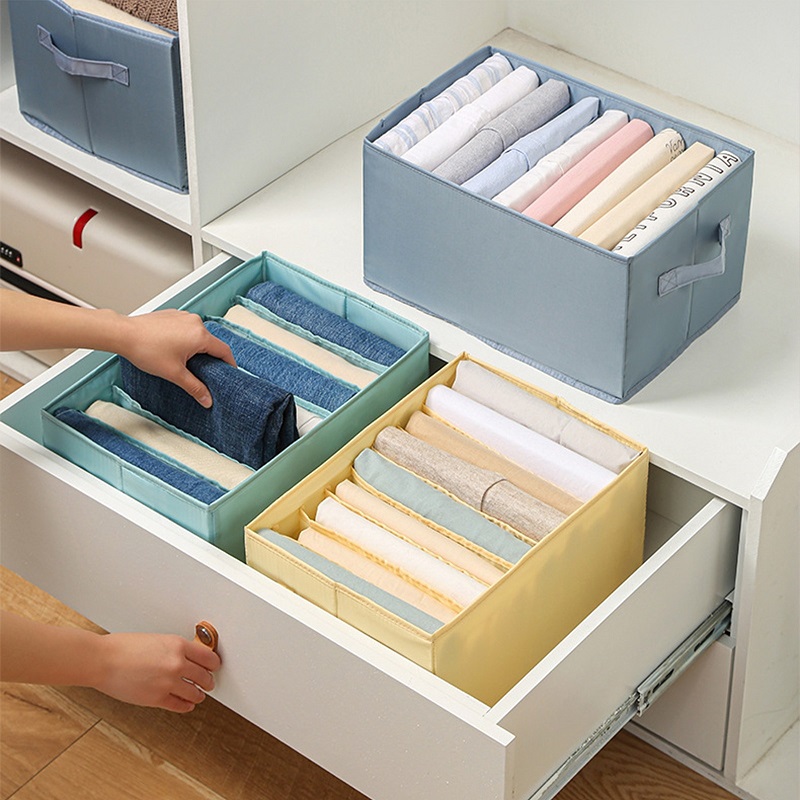
With your DIY organizer in place, it’s now time to get those socks back in the drawer! This part can be quite therapeutic as you treat this as a fresh start. Begin by grouping your socks into categories that you identified earlier. Think of how you would like to access your socks daily; do you prefer your dress socks readily accessible for the workweek, or would you like to tuck away your seasonal favorites?
Start placing your socks in the designated sections of your organizer. For daily wear, opt to roll your socks instead of folding them, as this method can save space and help you identify pairs more easily. If you find yourself with a surplus of socks in one category, evaluate if you truly need them all and consider parting ways with a few.
It’s also a good idea to keep your most frequently used pairs at the front for easy access, while seasonal items can go toward the back. You could even think about color-coding your categories to add an extra layer of organization while making your drawer visually stunning. This systematic arrangement not only enhances your efficiency during those busy mornings but also keeps everything in your sock drawer looking neat.
Step 5: Maintenance and Upkeep
Having successfully transformed your messy sock drawer into an organized masterpiece, the next step is to ensure that it remains that way. Establishing a maintenance routine will prevent the return of clutter and chaos. A simple rule of thumb is to manually check your sock drawer every month to ensure everything remains tidy and in its designated section.
Every time you do laundry, take a moment to immediately put your clean socks back in their organized spots, rather than just tossing them into the drawer. Develop the habit of checking for mismatched pairs; if you find one without its partner that has been missing for a while, it’s probably time to let it go.
You can also set aside some time twice a year to reassess your entire sock collection. Rotate seasonal socks as necessary: put your summer socks away in storage during winter and vice versa. Continual evaluation is essential in sustaining order. Remember, an organized sock drawer isn’t a one-time project; it requires a commitment to keep it neat over the long term.
Step 6: Additional Tips for Success
In addition to the steps outlined, here are some extra tips to help you keep your sock drawer in optimal shape. Consider labeling your compartments if you have a particularly large array of socks in different styles—like casual, formal, and socks for working out. This will save you time when searching for the right pair.
Another useful strategy is to always put socks back in the drawer when you finish wearing them. This prevents the buildup of stray socks around the house and helps you stick to the organization plan.
For those who have children, involve them in the project. Making it a family activity not only teaches them valuable lessons about organization and tidiness but also instills a sense of ownership over their belongings. You might surprise at how motivated kids can be to keep their sock drawers organized when they have a say in how things are arranged.
Conclusion: The Joy of an Organized Sock Drawer
Transforming a messy sock drawer is more than just a task; it’s a commitment to living more mindfully and reducing chaos in your daily life. An organized sock drawer can save you time, lessen frustration, and enhance the overall aesthetic of your home. It provides a sense of accomplishment and creates a little joy every time you reach for a pair of socks.
By following the steps outlined in this DIY organizer guide, you’ll not only revolutionize your sock drawer but will also cultivate habits that resonate through other areas of your life. A clutter-free space encourages a clutter-free mind, and what better place to start than with your socks? Enjoy the satisfaction of slipping into a beautifully ordered drawer every day, knowing that you’ve put in the effort to make your life just a little bit easier. Happy organizing!